
ElixirNode provides some of the best Virtual Private Server services in the market for its price. ElixrNode’s VPS services include fast CPUs, lots of storage, great reliability, and your very own dedicated IPv4 address. You may be wondering where or how you could enable IPv6 on your VPS to
ElixirNode provides some of the best Virtual Private Server services in the market for its price. ElixrNode’s VPS services include fast CPUs, lots of storage, great reliability, and your very own dedicated IPv4 address. You may be wondering where or how you could enable IPv6 on your VPS to ensure your server is ready for the future. The quick answer to that is there is no way to enable IPv6 through ElixirNode since at the moment it is not supported. You may be wondering then what is the solution to this problem and the best solution is to use an IPv6 tunnel service. Luckily, there is one available and the best part is that it’s free!
The service is called TunnelBroker and it is run by the internet backbone company Hurricane Electric. You may now be asking how does Tunnelbroker work? It’s simpler than you think. Basically after connecting your server via IPv4 to their router network and setting your DNS settings from your domain provider when someone sends request to your IPv6 address it really goes to TunnelBroker’s routers and then the request is sent over IPv4 to your server. Even though the information is sent over IPv4 your server will still also see it as IPv6. TunnelBroker also gives you an entire /64 address range by default which contains 18,446,744,073,709,551,616 (over 18 quintillion) addresses. You can also request a free /48 subnet which will let you create 65,536 of those /64 address ranges!
Most people here on ElixirNode will likely only need a single address to get their server IPv6 enabled. A good use case for the other addresses is using them in a VPN server. IPv6 will also ensure your VPS is ready for tomorrow’s internet. ElixirNode is dedicated to being the best vps hosting providers by ensuring you have the best vps for web hosting and vps for hosting any application in general by showing you that you can get IPv6 without much effort.
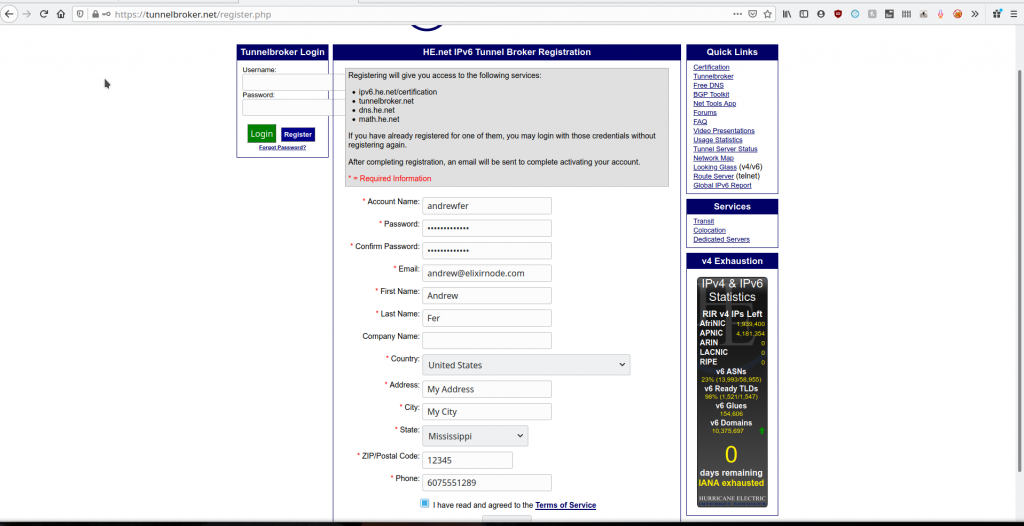
The first thing you need to do is set up an account here. It is free and no credit card information, etc.. is asked for. Put in accurate information and agree to the ToS. After you sign up confirm your email and log in
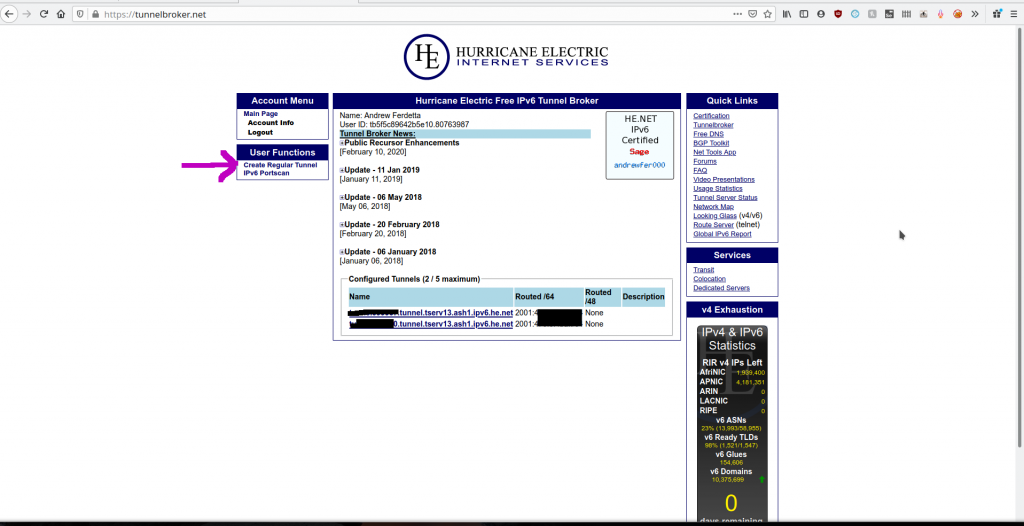
After signing up and logging in, look on the menus on the left hand side and click “Create Regular Tunnel“
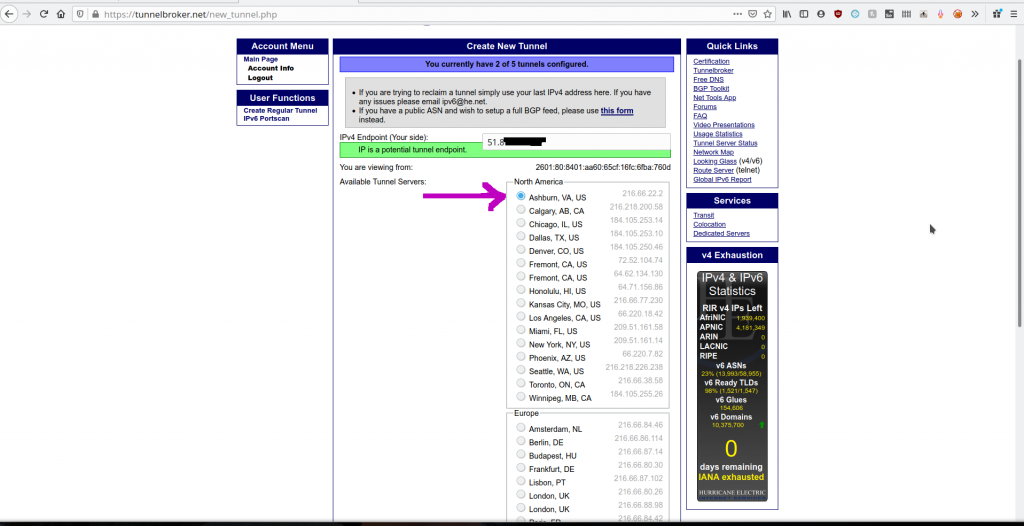
On this screen, Put in your VPS’s IPv4 address and select the tunnel you want to use. Since ElixirNode’s VPS hosts are in Virginia I would suggest using the “Ashburn, VA, US” tunnel since it is the closest. After you do that go to the bottom of the page and click Create Tunnel.
Back on the home page, look at the tunnel list and select your newly created tunnel.

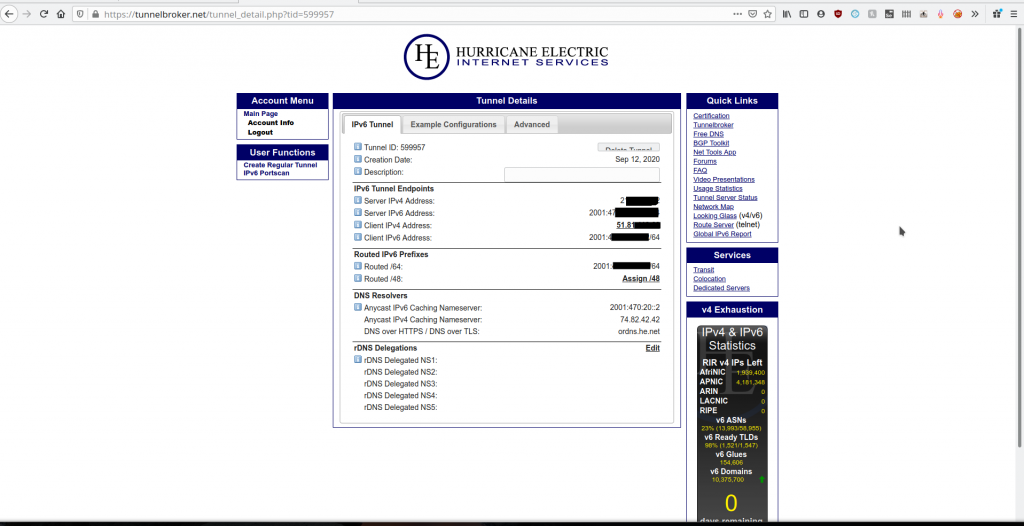
From there you should be on your tunnel’s information page. To get the IPv6 on your VPS go to the Example Configurations tab and select your VPS’s Operating System form the drop down menu. In my case it is Debain/Ubuntu. In some cases your operating system may be using Netplan for networking. You can test this by running which netplan and if /usr/sbin/netplan appears when you run that command then you must select the Netplan (Linux) option from the menu. Once you find the right option copy the text in the box and paste the text in the correct configuration file for your server. On ElixrNode’s Ubuntu 20.04 server that is located in the /etc/network/interfaces file.
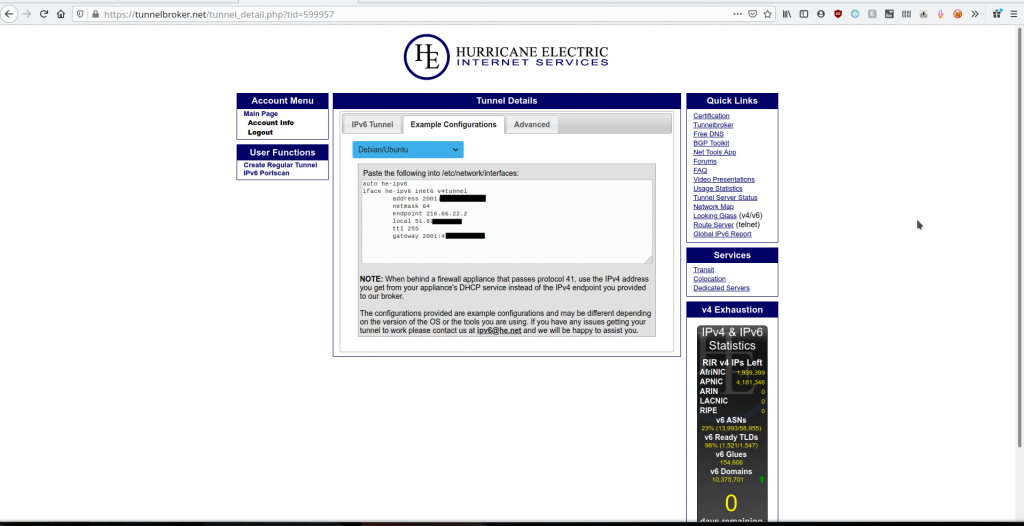

After that is done run systemctl restart networking to apply the changes. now run ip a or ifconfig to see that your IPv6 was applied! Now on your home computer try and ping the IP address and you should get a reply. You can now setup your AAAA records for domain like as if you had native IPv6. As of now, we do not know how this will affect your VPS with DDoS protection but we assume that our DDoS protection along with Hurricane Electrics’ built in protections will keep your server safe.

BOUNS: Hurricane Electric provides a free IPv6 certification if you can prove some basic knowledge of IPv6 and proof that your VPS (website) supports IPv6 connections and IPv6 email. It only takes about an hour to get to Guru level and if you get to that level you get a cool virtual certificate and a free T-Shirt. Start here.
If you have any questions or need any help contact us.