Requirements: * A registered domain. * ElixirNode website hosting. * OPTIONAL (but recommended): Dedicated IP. STEP 1 Login to the web hosting panel and click on Zone Editor: STEP 2 Once you’re there, you want to click on Manage: STEP 3 Click on Add Record: STEP 4 This is the most important
Requirements:
* A registered domain.
* ElixirNode website hosting.
* OPTIONAL (but recommended): Dedicated IP.
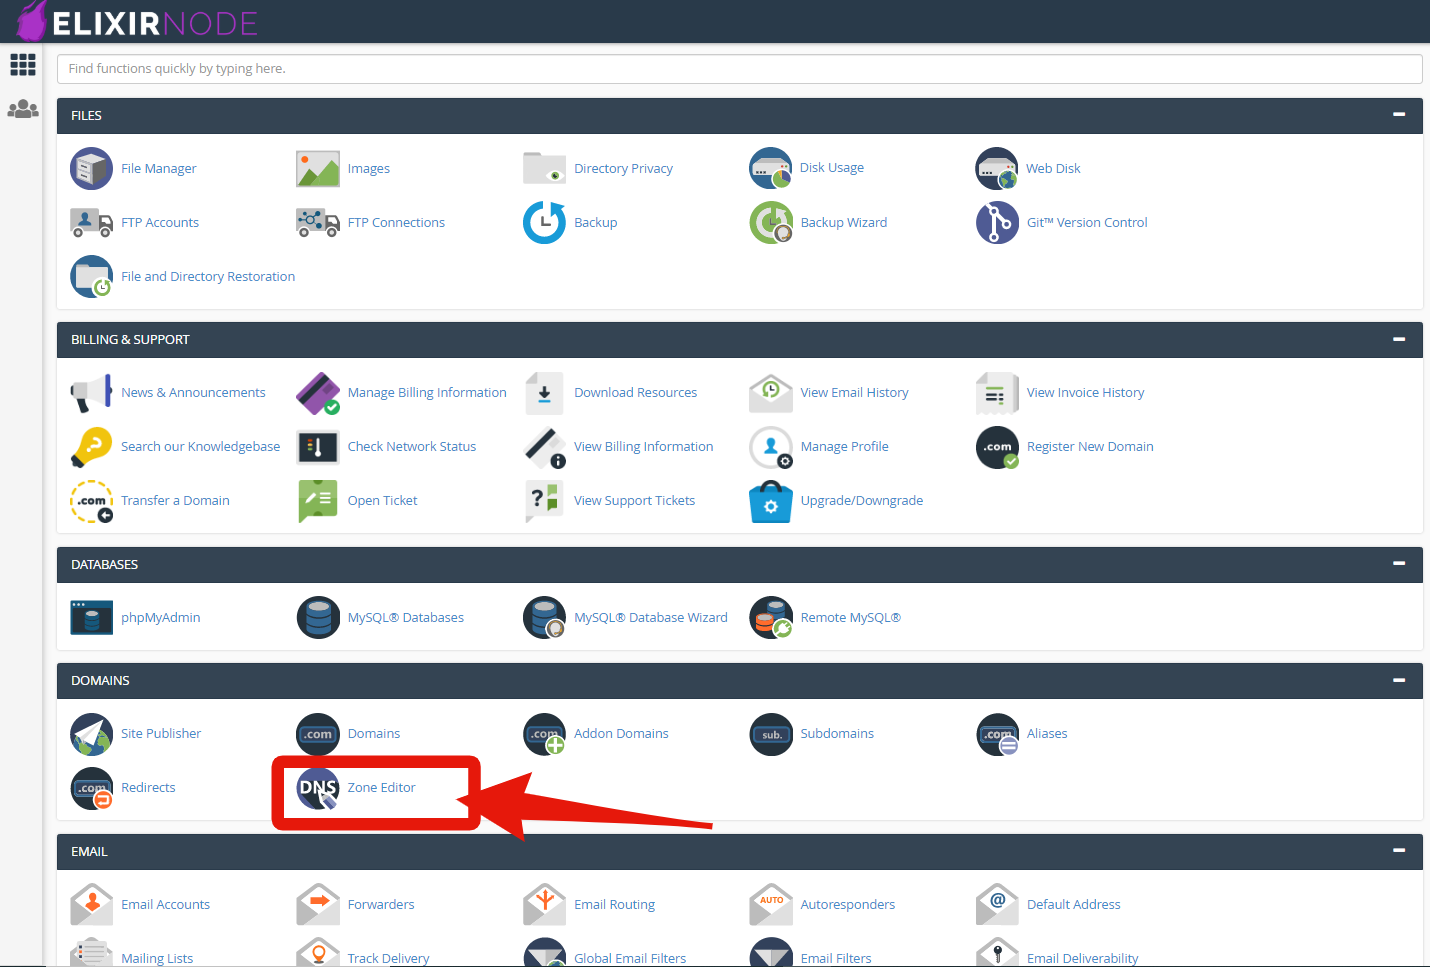
STEP 1
Login to the web hosting panel and click on Zone Editor:
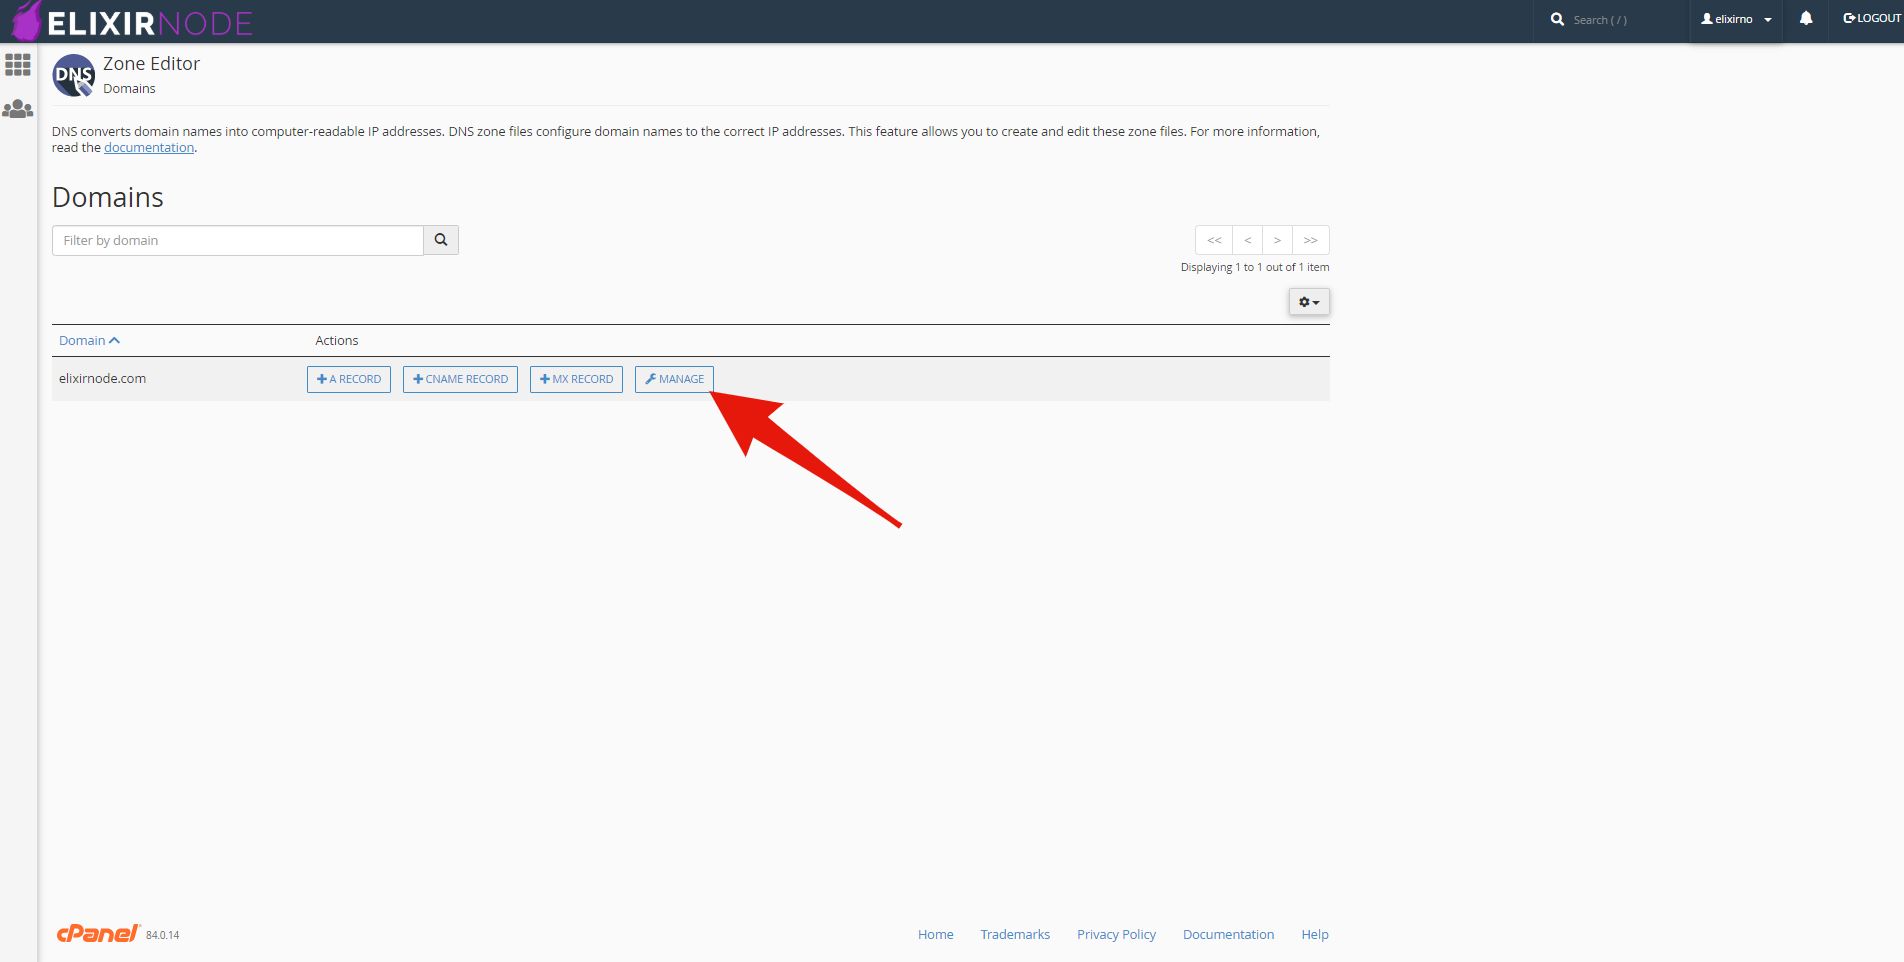
STEP 2
Once you’re there, you want to click on Manage:
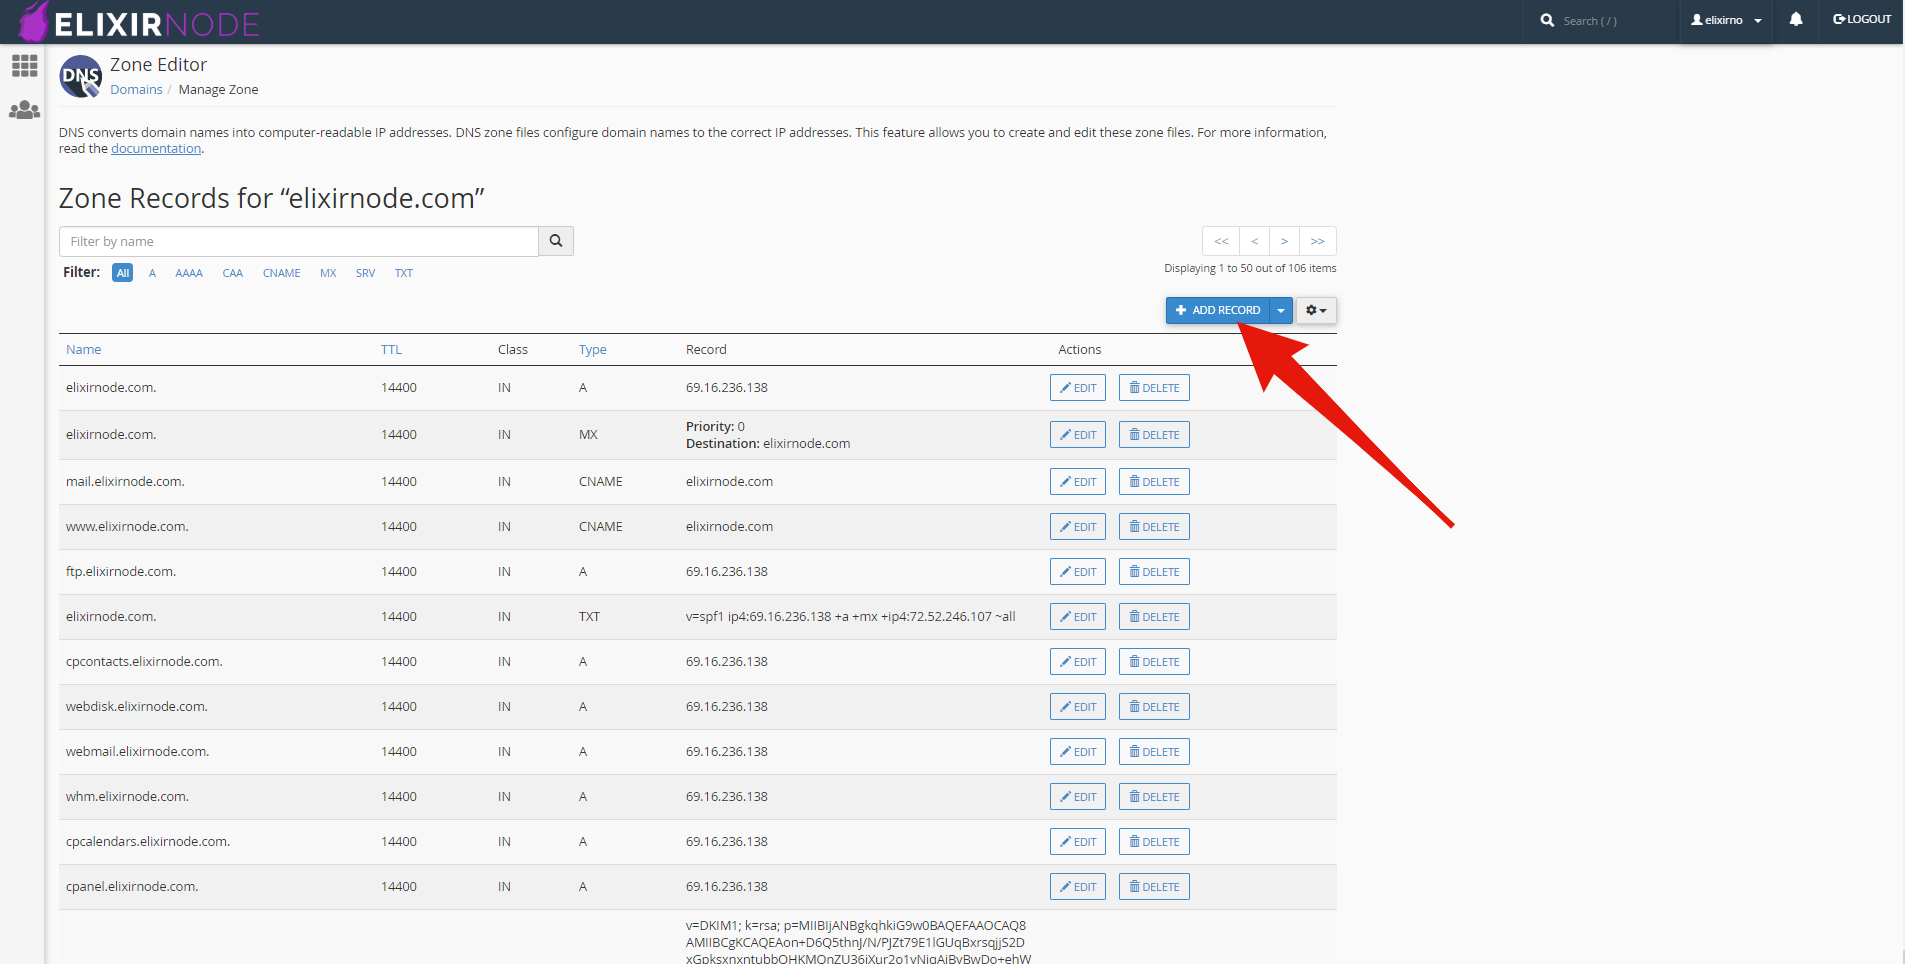
STEP 3
Click on Add Record:
STEP 4
This is the most important part, make sure you do this step correctly.
NOTICE: We recommend having a dedicated IP to connect your domain to your Minecraft server, it makes this process a lot easier and better.
With DEDICATED IP:
Create an (A) record, input the subdomain you want to use (for example I want to allow players to join my server through example.elixirnode.com so my subdomain would be example), you need to input this subdomain under “Name”. Then you need to input your Minecraft server IP under “Record”, do not edit TTL unless you know what you are doing.
Your record should look like this if you followed this step successfully:

WITHOUT Dedicated IP (not recommended):
If you are not using a dedicated IP you will need to create an (SRV) record in addition to an (A) record. For the (A) record you will copy exactly what I have done above with a dedicated IP, but instead of the subdomain you want to use, you will input a random subdomain for the (A) record and that’s the only difference. Add the record and then we will move on to the (SRV) record which will contain the subdomain you want to use to connect to your server. In this example our server port will be 25566 and our desired subdomain to connect to the server will be “mysubdomain”. This is what you need to input for each field:
* Under “Name” input your desired subdomain but use this format: _minecraft._tcp.play.yourdomain.com
* Under “TTL” set it to 3600.
* Under “Record” you want your Priority and Weight to be set to “0”. Then for Port you will input your Minecraft server IP port, ours will be “25566”, under target you will input the random subdomain you choose for the (A) record, ours was “example.elixirnode.com”.
Once you have done all that, click “Add Record”
Here is how the record should look:

If you find any outdated information or still need help contact us @ https://elixirnode.com/support
Thank you,
ElixirNode Support Team
FREE game server, VPS, web host, dedicated IP & more on most plans!
Get Started