This article will guide you through the process for adding a Jar that isn’t offered by default for Minecraft server hosting best using our game panel.
STEP 1
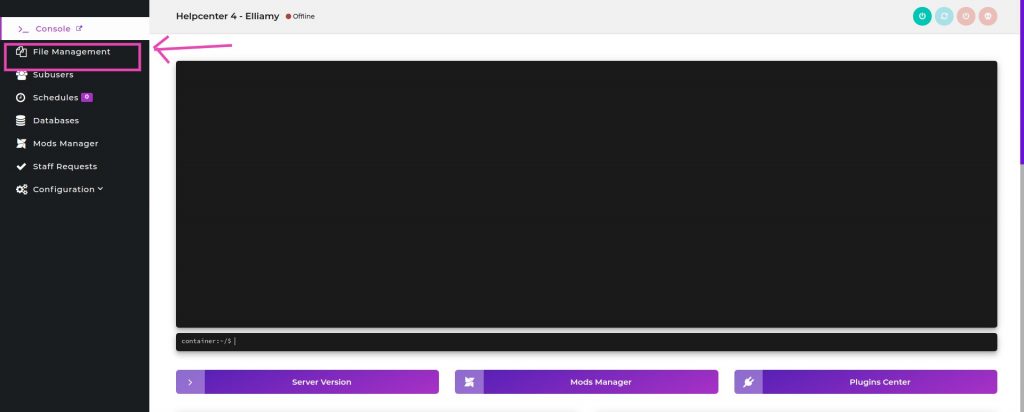
Log in to the game panel and select the server you want to add the custom Jar too, then click on the file management button on the left-hand side of your screen.
STEP 2
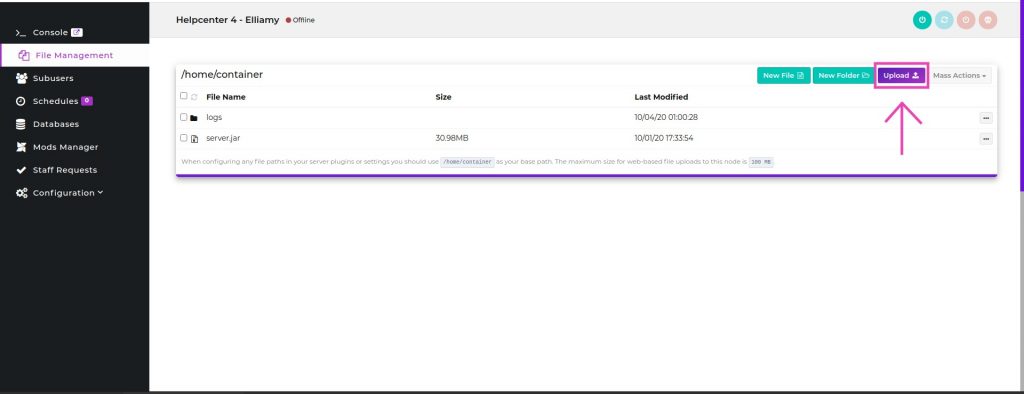
Once on this screen, click the upload button in the top right.
STEP 3
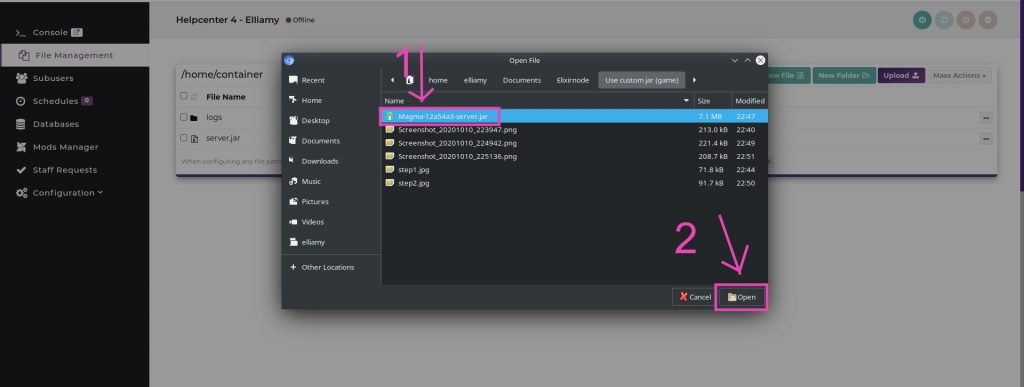
Select the Jar file you wish to use and click on it, then click the open button on your computer window, this will let the Jar begin uploading to your server.
STEP 4
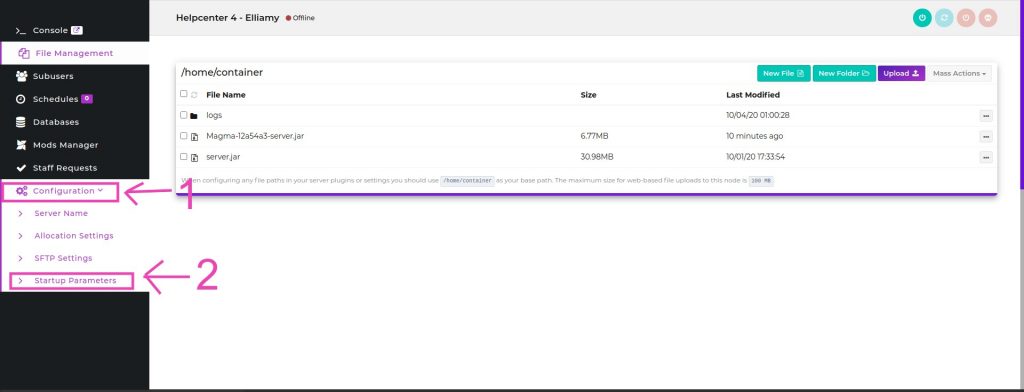
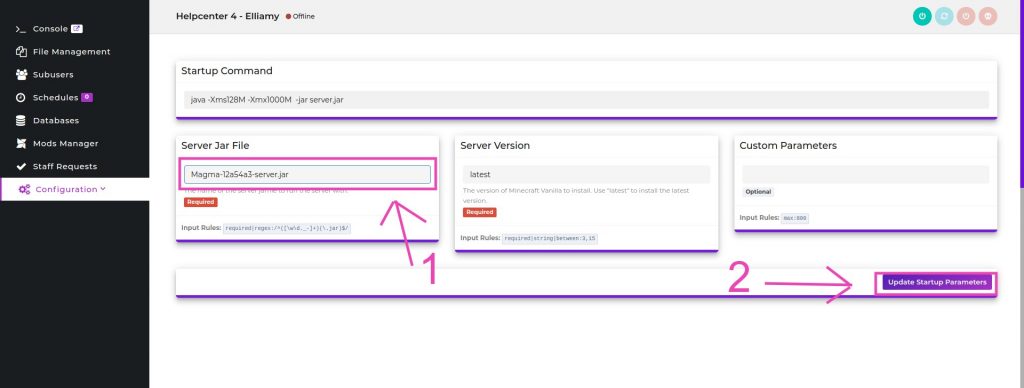
Navigate to Configuration then Startup Parameters.
STEP 5
Paste the name of your Jar file, including the .jar into the box labeled server jar file. Once done, click on update startup parameters.
STEP 6
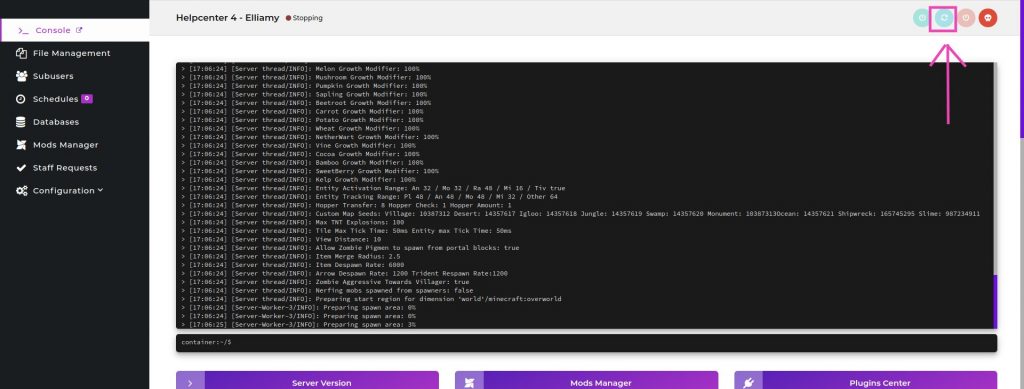
Restart your server and enjoy your new jar file!
If you’re looking for some inspiration for your next server jar we’ve created a list of the best (in our opinion) jars for your server, which you can find here! There’s also a massive variety of different jars to suit your every need on minecraftjars.net. We even have a tutorial on how to use the site which can be found here.
If you need any further help or have any questions, contact us!

