
Factions is a popular game mode for Minecraft Multiplayer Servers. Most Factions servers use version 1.8.8 because it is the last version with the old PvP mechanics. Factions is essentially survival Minecraft with a slight twist where players can join teams and battle other teams and steal territory,

Factions is a popular game mode for Minecraft Multiplayer Servers. Most Factions servers use version 1.8.8 because it is the last version with the old PvP mechanics. Factions is essentially survival Minecraft with a slight twist where players can join teams and battle other teams and steal territory, loot etc.. Factions isn’t very difficult to get up and running depending on how complex you want to make it. Factions requires a lot of CPU power and memory especially as your server grows so you’re going to want to go with one of the best and most affordable Minecraft server rentals on the market from ElixirNode. Your best bet is to do with either Premium or Deluxe mc server hosting with at least 4GB+. There are also two types of Factions Servers. The first being “Persistent” meaning the server never resets or resets very rarely and “Seasonal” where the server resets every few weeks or months where everyone gets a near-fresh start like Hypixel’s Factions with new features and twists being added almost every “season”. ElixirNode’s easy to use Minecraft hosting panel makes it easy for you to run any type of Factions server! This is a Minecraft server hosting how to set up a simple factions server. Since this Minecraft server hosting how to we will go over each step in detail. Feel free to change and customize steps to your needs.
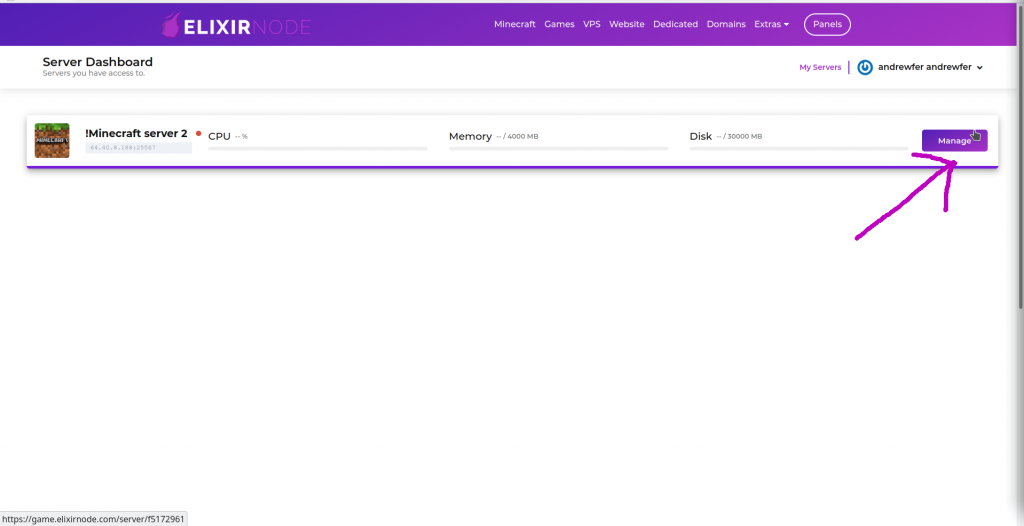
After buying your Minecraft Server wait for it to get deployed and then log into the game panel. Click the Manage button on the right to start configuring your new Minecraft rental server. We now need to set the Minecraft Version and install our plugins. You may also use a custom jar if you’d like which you can learn how to install here, it is also safe to know that PaperMC is the #1 in the top 5 minecraft server jars.
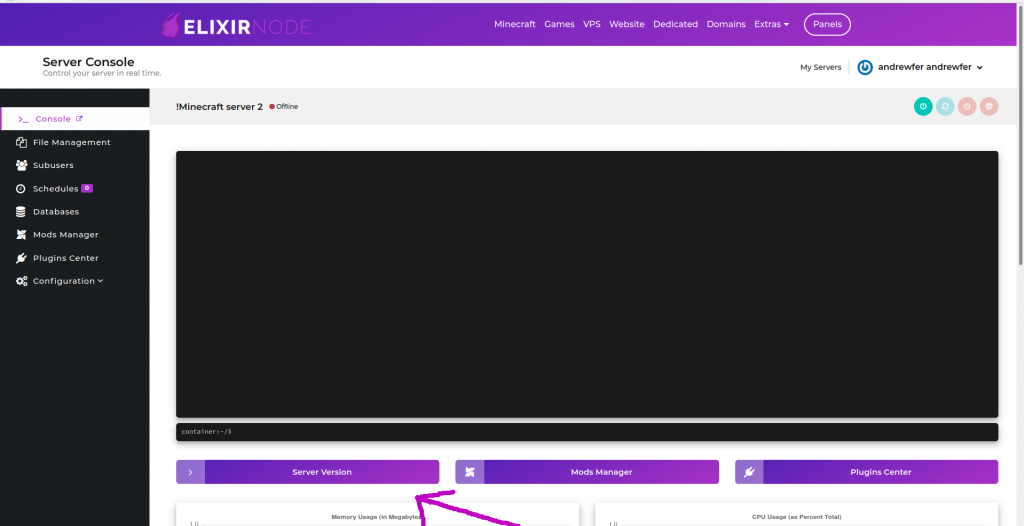
Once in the management panel, make sure the server is stopped. Then click on the Server Version button.
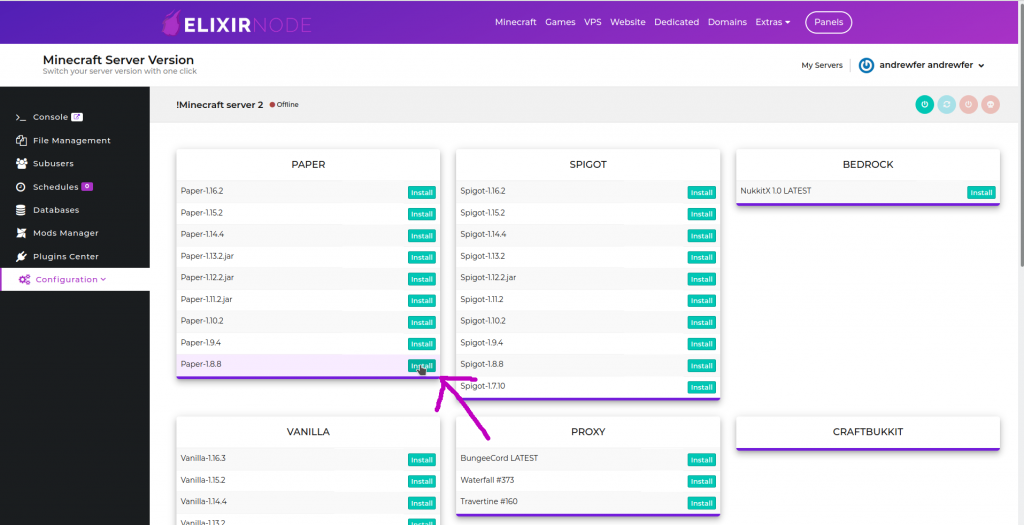
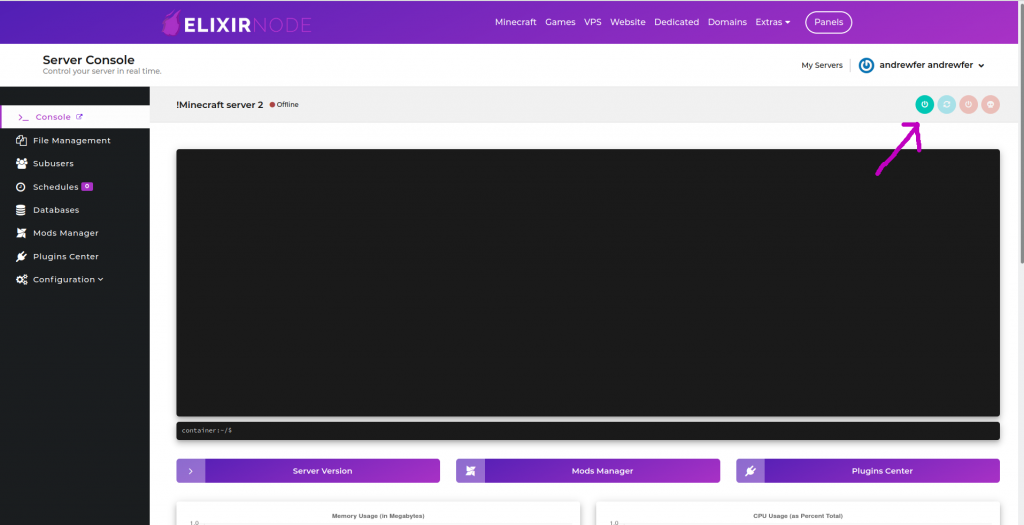
Once you are on the server versions page look in the first column on the left called “Paper“. Select Paper-1.8.8 from the list and click the blue Install button. When the warning pops up click Yes and then Yes again to delete the old server files. After that go back to the console and start the server. When the server starts be sure to accept the EULA by clicking the “Accept Eula” button. We choose Paper because PaperMC is a fork of Spigot and the best for Factions since it is faster and more optimized than spigot. It is the first choice for most Minecraft Servers on ElixirNode. If you want minecraft server hosting with mods then you can use something like magma 1.12.
Now that your Minecraft rental server is up and running, You can now install plugins! Here is the list of plugins I will be using for my server. All of them are free except for two. But they can be obtained for free legally but you will not get support. But we are the best Minecraft server hosting so do not worry about these bogging down your server.
(Bolded plugins are required for the server to function, others are optional.)
InfoBoard– Shows a information board on the left of your screen
Vault– A required dependency for other plugins
PlaceHolderAPI– A required dependency for other plugins
ProtocolLib– Provides read/write access to the Minecraft protocol
AdvanceBan– A Free and Open Source alternative to LiteBans
Obsidian Destoryer– Allows bases made with Obsidian and Bedrock to be destoryed
AntiCheatReloaded- A Free and Open Source anti-cheat plugin
NuVotifer– A maintained version of Votifer. Required for votes to be received. Its also a dependency for SuperbVote
SuperbVote- A vote listener to give players rewards when they vote
Bow Vote Party- Gives everyone on the server a reward after a certain amount of votes
Citizens2– An Open Source plugin that allows you to create interactive NPCs
Tab– A Tab menu to show server stats
Custom Enchantments– Create custom enchantments
Tim The Enchanter– Set enchantments way above normal limits. Replaces the regular /enchant command
SaberFactions– The Free and Open Source Factions plugin with a ton of features. It is very customizable and is better than most paid premium plugins. Their discord is nice too.
LuckPerms (choose Bukkit)– A much better alternative to the old PermissionsEX and Essential’s GroupManager plugins. Allows you to create ranks with specific permissions. It also has an easy to use web interface.
EssentailsX (Essentails, Chat, Spawn)- The Essentails Plugins required to have certain commands such as /spawn, /fly, and chat prefixes.
Crazy Crates– A Free and Open Source plugin that allows you to create crates and keys to reward players with unlimited crates and many crate types.
Crazy Auctions– A Free and Open Source plugin that allows players to sell and auction items with a few simple commands.
Crazy Envoy– A Free and Open Source plugin that drops gift crates out of the sky to draw players into PvP battles.
ViaVersion– Allow users with up to the latest version of the game connect to your server running on an older version of the game.
WorldEdit 6.1– Easily remove or place thousands of blocks in seconds. Its also a dependency for WorldGuard.
WorldGuard 6.2- Create protected regions with rules.
Holographic Displays– Create holograms with information. More info here
McMMO (1.7.10)– Extend your server and allow your long time dedicated players to level up with McMMO. A Free and Open Source plugin that turns Minecraft into a MMO style game.
Plan (PLayer ANalytics)– Advance player analytics and tracking. Great for Admins who want to keep track of their staff or keep an eye on certain players.
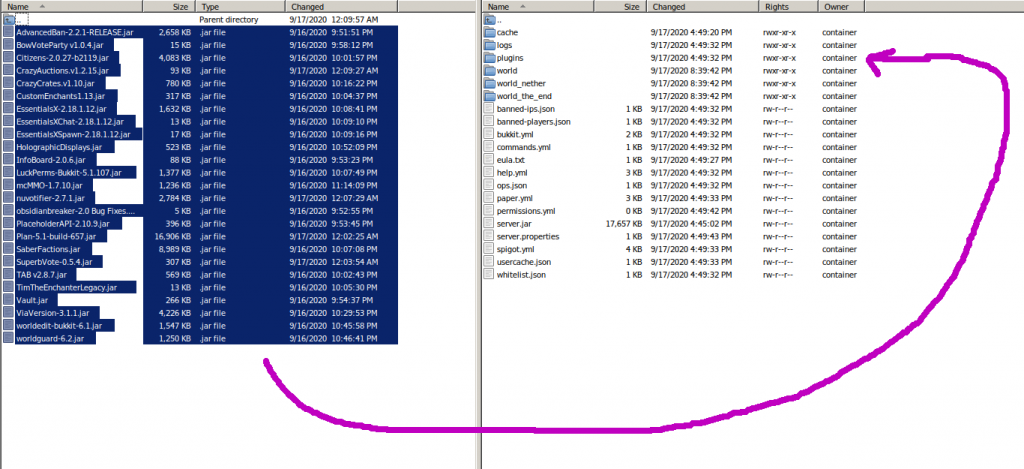
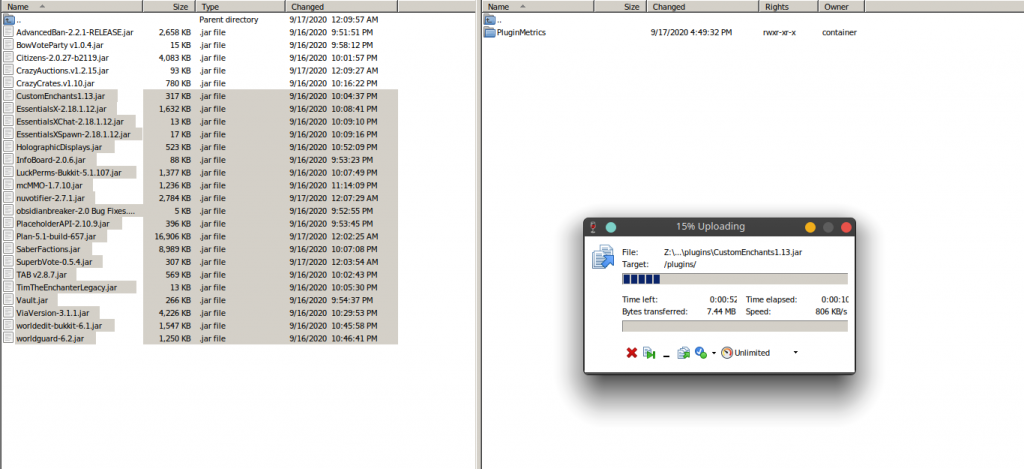
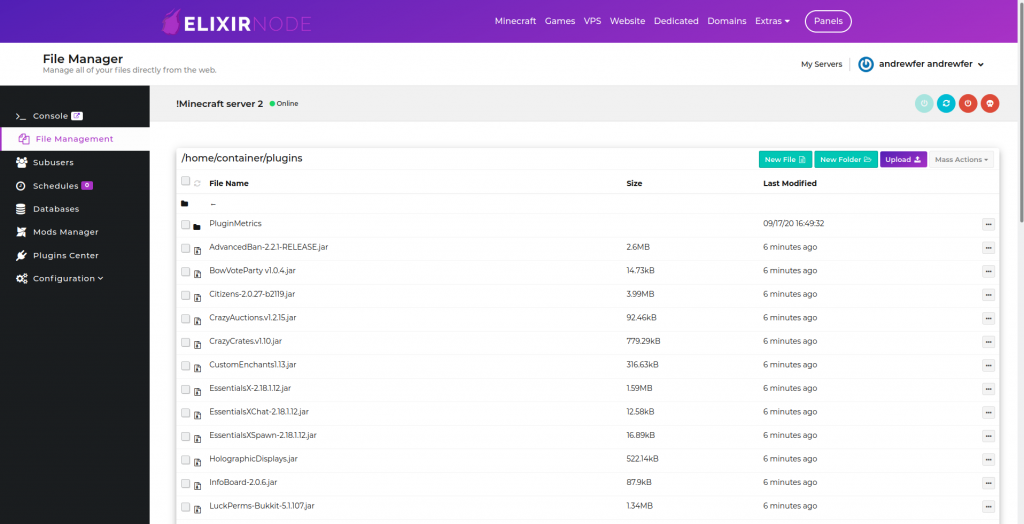
Download all of these plugins to your computer. I suggest saving them to a special folder or your desktop so you know where they are. After that upload them to your server either through the file manager or through an SFTP client like FileZilla or WinSCP. I will be using WinSCP for my file transfer. The first step is to log in to your SFTP Client or the web file manager then open the plugins folder. Then drag the plugin jars from your computer to the server’s plugins folder like I did. Once the upload is complete, refresh the web file manager to verify your files are there. Finally restart your server.
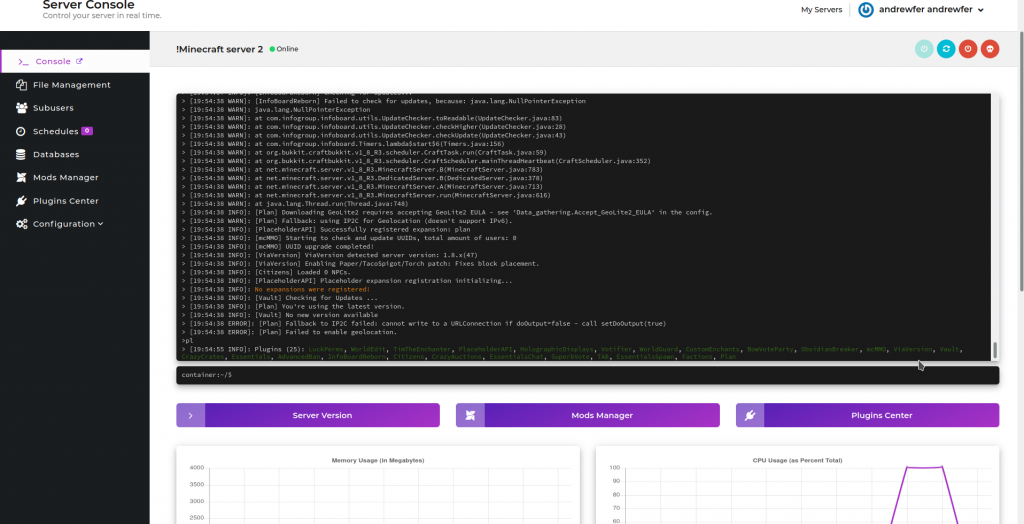
Once the server is restarted, you should be able to run the pl command in console and verify all the plugins are working (green). If any are red then you should go to the plugin developer’s website and download any dependencies it may require. You can also use the mc server host’s server plugins manager built into the panel if you’d like.
Now it’s time to join your server. Copy the IP in your panel and paste it into your Minecraft Client so you can connect to the Minecraft Server Host’s system. If you installed ViaVersion you should be able to join using the latest version of Minecraft.
As you can see a lot of the stuff isn’t set up yet. The first thing I’m going to do is build a spawn. A Factions spawn just needs to be a square platfrom where players can just drop off into a PvP area. You can build it however you want. If you do not know world edit commands read their wiki. Use /setspawnto set the spawn for the default group
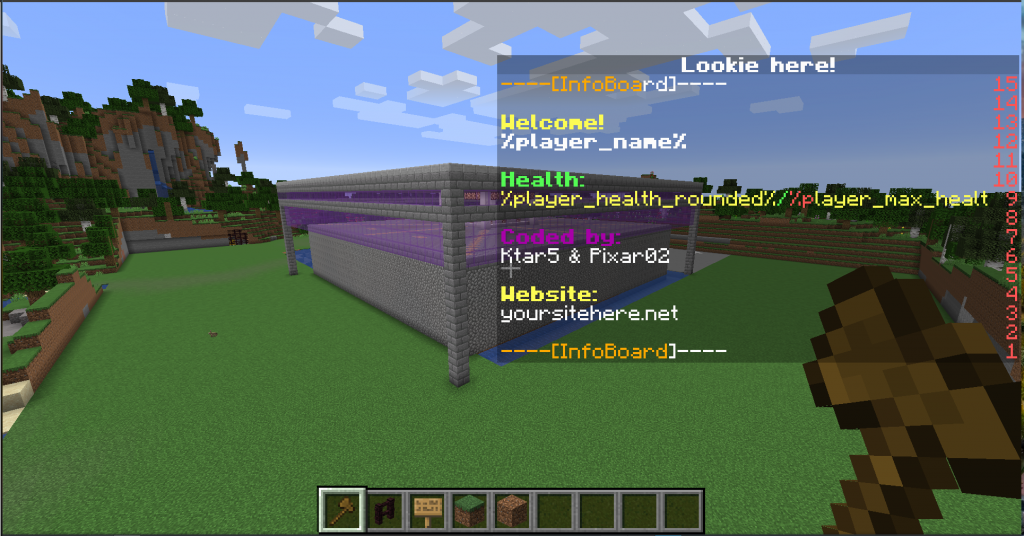
Now let’s set up Worldguard for your spawn and PvP-only area. Like world edit select your two points one coroner being far up in the sky and the other being far underground. I usually make the PvP-Only area very large. After you selected the area which in my case came out to be over 8+ million blocks, type /rg define spawnpvp. As soon as that command is done no players besides OPs should be able to break or modify any blocks.
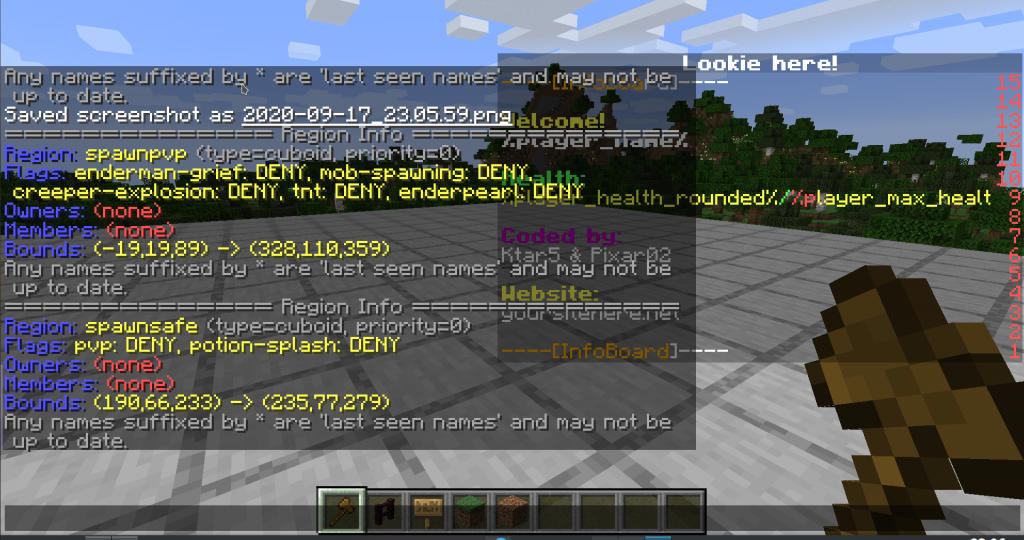
Now we need to set some flags for your spawn. type /rg flag spawnpvp list to view a list of all the flags or just go here to see a list. Most PvP areas have mob spawning, mob greifing, enderpearl, creeper-explosion,fall-damage, and enderman-grief set to deny. To do that run /rg flag spawnpvp <flagname> allow/deny/none i.e /rg flag spawnpvp mob-spawning deny Now you need to create a separate “safe zone” at spawn so players do not PvP. My safe zone is just going to be the spawn box I built as seen above After selecting the new area I ran /rg define safespawn and then /rg flag safespawn pvp deny and /rg flag spawnsafe potion-splash deny There may be more to set but this is a good basic setup. You can now run /rg list to list protections and /rg info <regionname> to get it’s info. Make sure you run /rg flag spawnpvp pvp allow so players can battle outside of the spawn box.
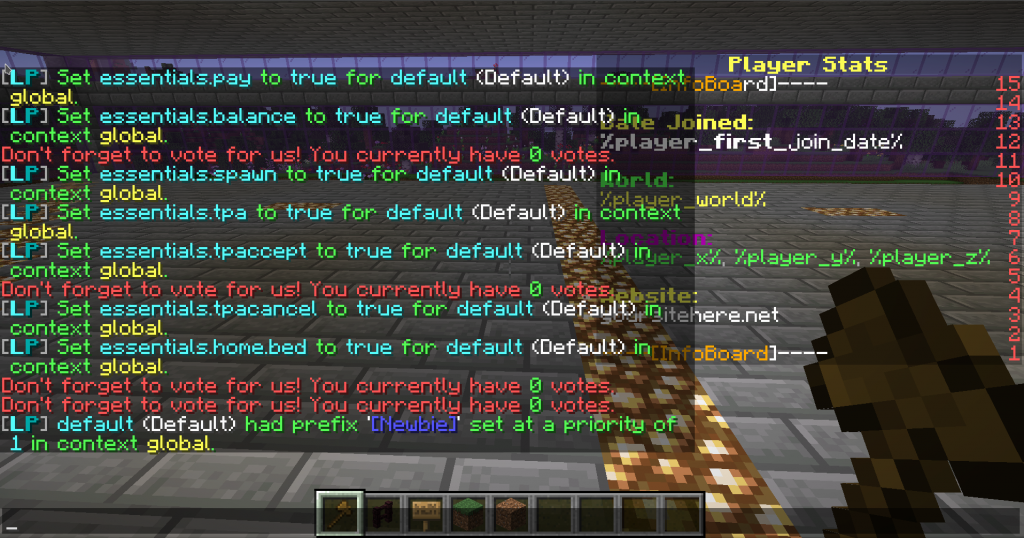
In order to get factions working we need to set the permissions for the default rank. Personally I think that LuckPerms is the best choice because it has the most features, its free, and has great support. Every player who joins automatically has the “Default” group set. If you plan to run a larger sever In would suggest setting up a MySQL Database for Luckperms which can be setup by using the Minecraft hosting panel.
Lets add some permissions/lp group default permission set factions.kit.fullplayer true /lp group default permission set essentials.sethome true/lp group default permission set essentials.home true/lp group default permission set essentials.pay true/lp group default permission set essentials.balance true/lp group default permission set essentials.spawn true/lp group default permission set essentials.tpa true/lp group default permission set essentials.tpaccept true/lp group default permission set essentials.tpacancel true/lp group default permission set essentials.home.bed true/lp group default permission set essentials.rules true/lp group default permission set essentials.help true/lp group default permission set bukkit.command.help false/lp group default permission set bukkit.command.plugins false/lp group default permission set crazyauctions.sell true/lp group default permission set crazyauctions.sell.32 true/lp group default permission set crazyauctions.bid true/lp group default permission set crazyauctions.bid.32 true
Setting Prefixes
Example- /lp group {groupname} meta addprefix {weight} {prefix}
This will set a weight of 1 to a blue [Newbie] prefix that will be assigned to the Default group. Get color codes here. /lp group default meta addprefix 1 &9[Newbie]
Create a bold red Owner rank for yourself/lp creategroup owner/lp user {username} parent add owner/lp group owner meta addprefix 2 &4&l[Owner]
You can add more groups and do some advance configuration by reading the Wiki on Luckperm’s Github
Now that we have that set up lets set up the most important plugin. Which is obviously Factions! I choose Saber-Factions because it is free, open source, and is comparable if not better than the premium FactionsUUID. There is not much you need to do besides set up the permissions which we already did in the previous section. Need more information? Read their wiki on Saber-Factions Github.
To setup for your PvP area, run /f bypass then run /f claim <chunks-radius> Warzone RIGHT at your spawn location for me it is /f claim 12 Warzone You do not have to create a Safezone since the spawn area has it’s own worldguard reigon with PvP and potions disabled.
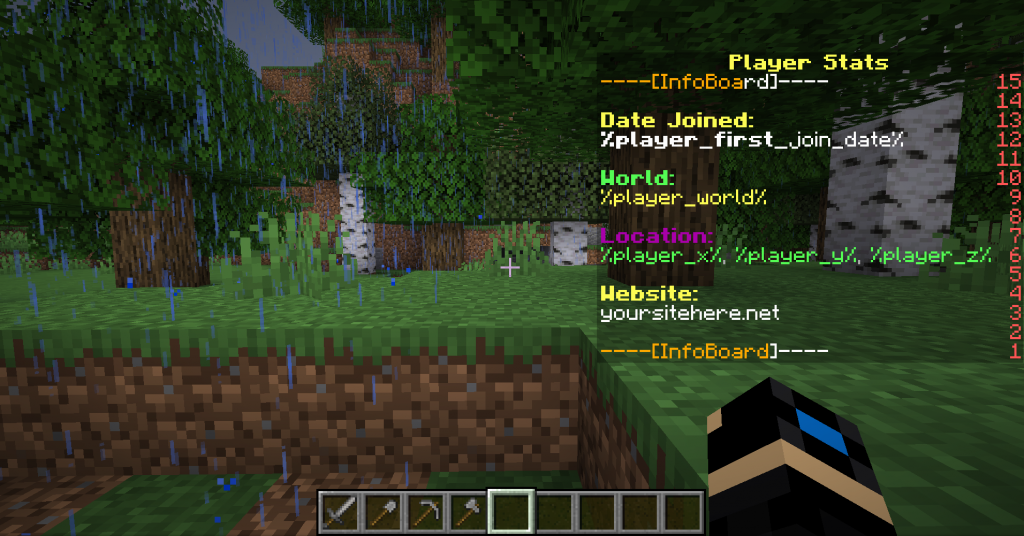
Now, Lets set up our info board. It seems like in my case (and likely yours too) that the placeholders are not working which is because PlaceholderAPI does not download extensions automatically anymore. To fix this just run /papi ecloud download player and then /papi reload and it should be fixed. To edit the board yourself either use SFTP or the built in web file manager on the Minecraft host’s game panel and go to plugins -> InfoBoardReborn -> board.yml Inside the board.yml looks like these two images.
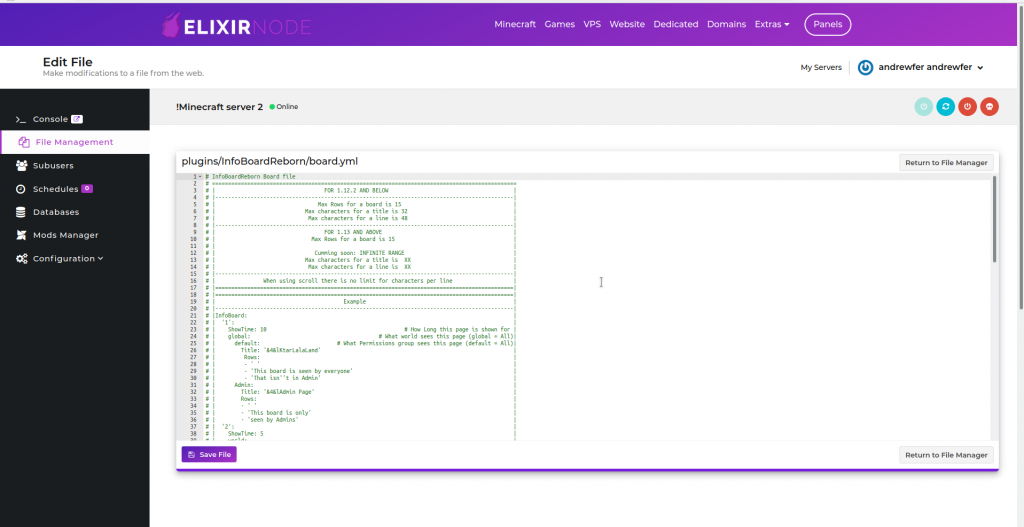
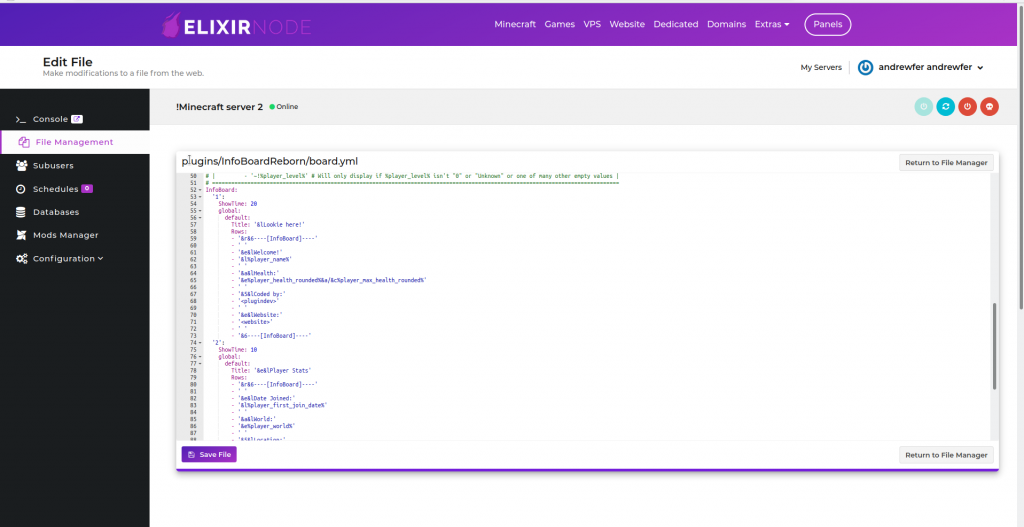
As you can see On Line 57, Change the title from ‘&lLookie here!’ to ‘&lWelcome’ or to whatever you want. Use the same Minecraft formatting codes as you would use for Luckperms. If you do not want to have the code devs listed delete lines 67-69 (assume all line numbers mentioned below 67 from here on after are with those three lines removed) You can also change the veriables in the config.yml file in the same directory. On line 42 change your website name to your domain. Once you are done, run /ibr reload to see your changes. (note, Elixirfactions.net is not real)
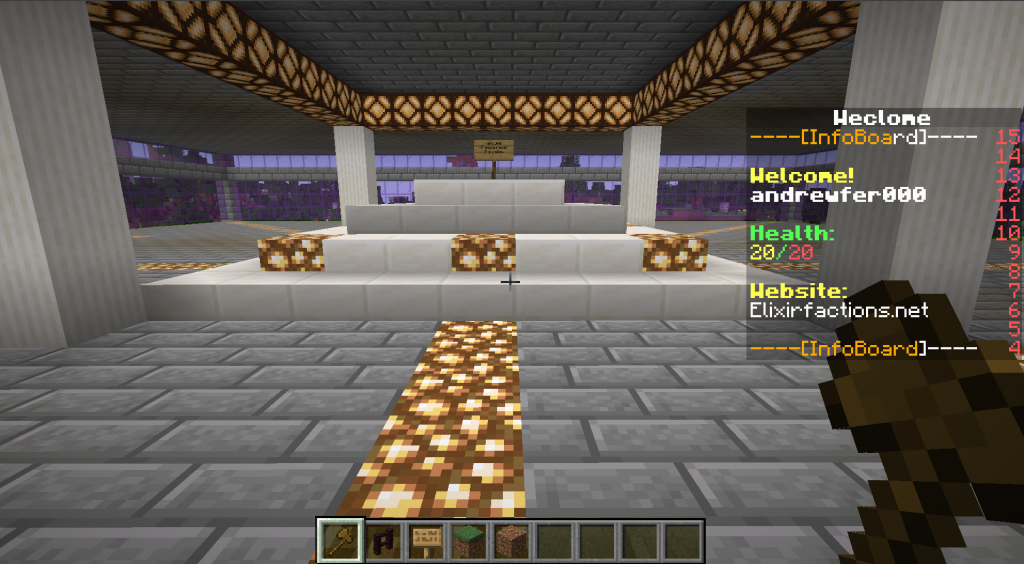
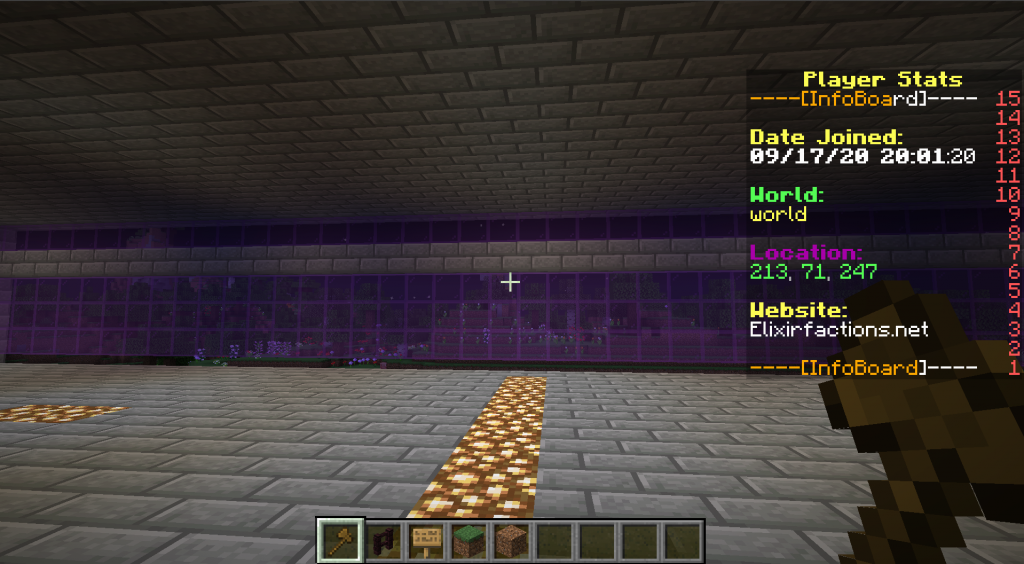
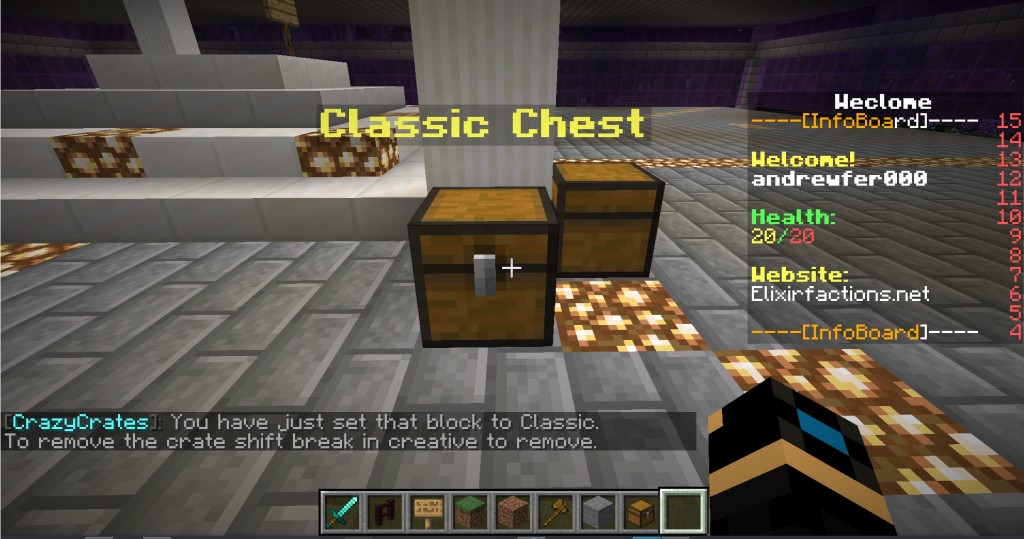
Now let me show you how to setup some reward crates for players. The plugin we will be using is CrazyCrates. CrazyCrates has some basic chests built-in. To set a crate you need to look at a block or chest and run /cc set <crate name>, for example /cc set Classic if you need to destroy it you can shift+left click and it will turn it back to a normal block.
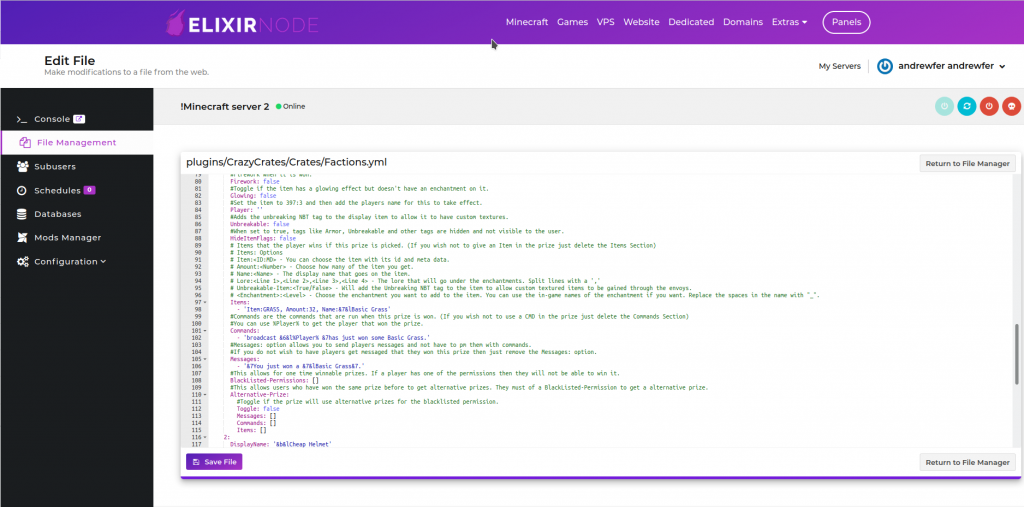
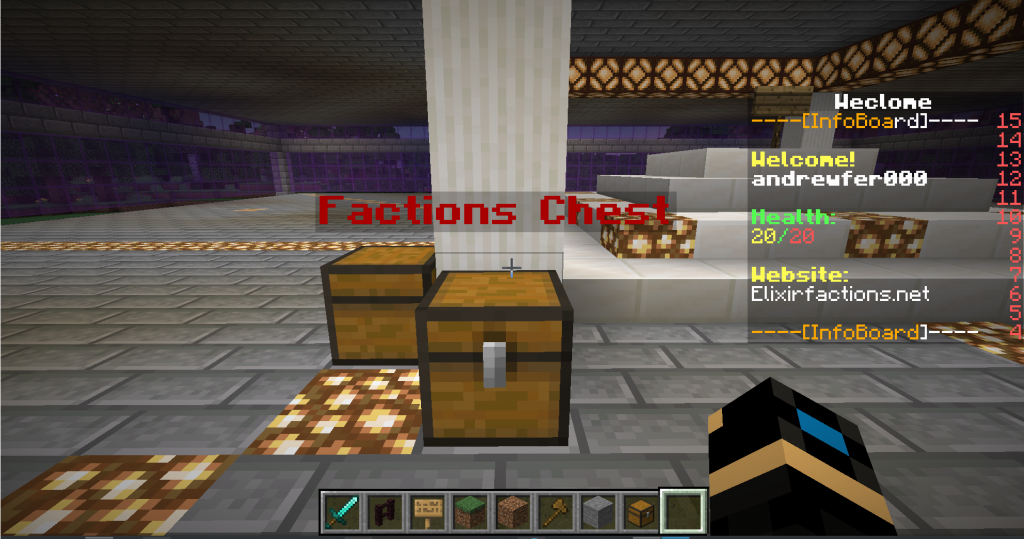
If you want to create a new chest then go into plugins-> CrazyCrates-> Crates and make a copy of the any of the chest types and name it something different. I made a new file called factions. Lets look at the Yml for it. First look at the crate type. CSGO type is the most simple but there are ten other types as well but they require configurations. Second, Go to the line that says CrateName and change it. I changed mine from '&8Basic Crate' (what I copied) to '&4Factions Chest' or whatever you want. Make sure you do not delete the ‘ ‘ or else the plugin will break. Next change the preview name. I changed it from '&8Basic Crate Preview' to '&4Factions Chest Preview' Under that you have the Preview settings under that you have PhysicalKey settings, and under that you have the Hologram Settings. In the Hologram area change the message line at the bottom of the section to '&4&lFactions Chest' to make it bold and red. Right under that is the last but most important section. The Prizes! Since this is a copy of the basic chest. A Prize can give items, run commands, or do both! You can even set alternative prizes so a user who has a lot of keys cannot get super rich quick. Since this is just a demo I am not going to change the items right now. When you are done, go back in game and do /cc reload then go to your game. Then run /cc set again for me it was /cc set Factions. You can now give players a key using /cc give physical <crateName> <amount> <playerName> for me it was /cc give physical Factions 1 andrewfer000 You can now open your crate.
NOTE: On 1.8.8 (or any other pre-1.12) you need to change item names into their item IDs. For example the GOLD_HELMET needs to become 314
This would be a good time to get some testers on your server to make sure everything works. I would suggest getting friends or other trust-able players who will report any problems to you and give you good ideas. It’s also a good idea to log in with your alt account to test the server but only if your PC can handle two Minecraft sessions at once. Since ElixirNode is the best hosting for minecraft servers you should not have an issue connecting with many clients
I’m going to end it off here. This is a great start to getting Factions 1.8 working on your ElixirNode Minecraft server rental but there is a lot more to do such as setting up Voting, Player Analytics (Plan), CrazyEnvoy etc.! If your server grows big remember you can purchase a Minecraft server upgrade any time! Thank you for reading my minecraft server hosting how to and if you need any help feel free to contact us. We are always happy to help since we are the best hosting for minecraft servers!