This tutorial will teach you how to install a custom server icon on any version of Minecraft server hosting. A good server icon is very important as it represents your server and makes it memorable for players.
STEP 1
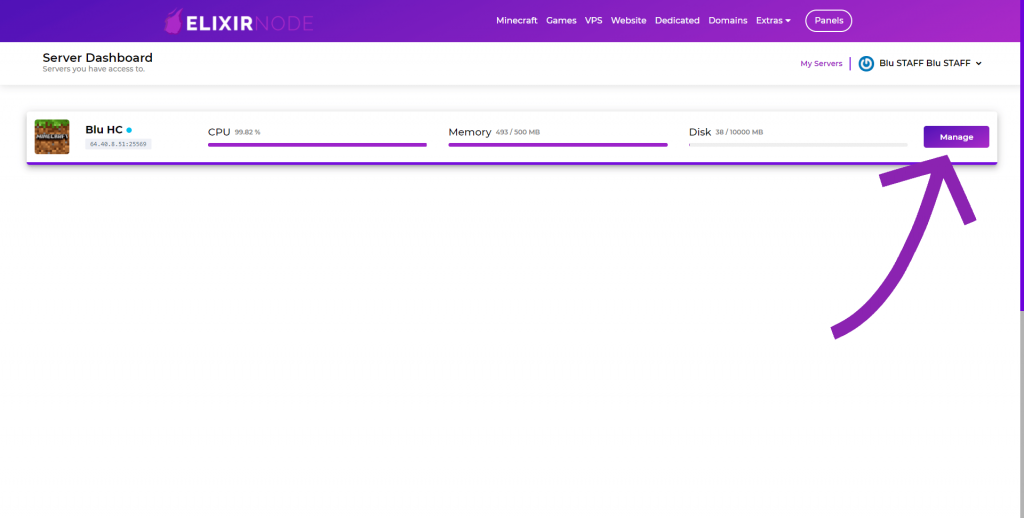
Log into the Game Panel here. From there select the server you want to add an icon to by pressing the “manage” button on the far right of the server information.

STEP 2
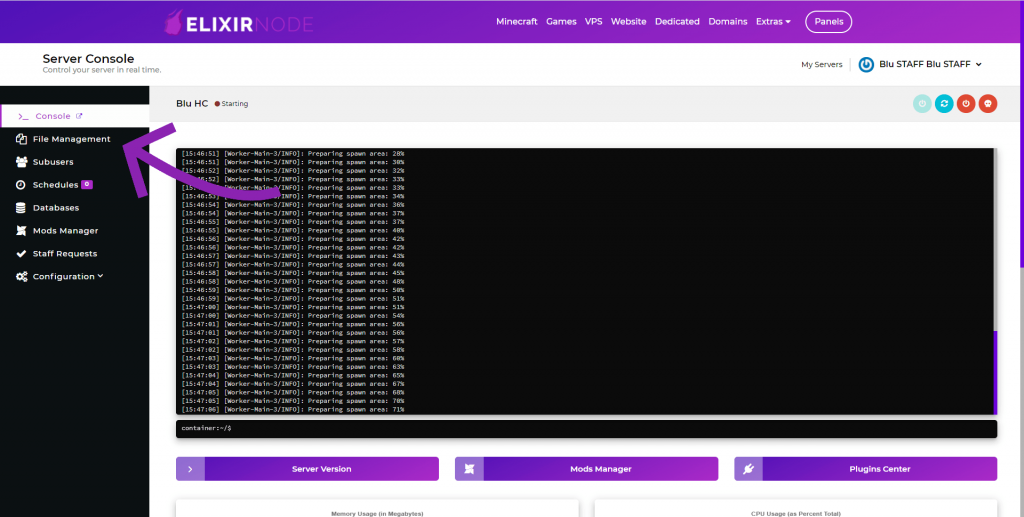
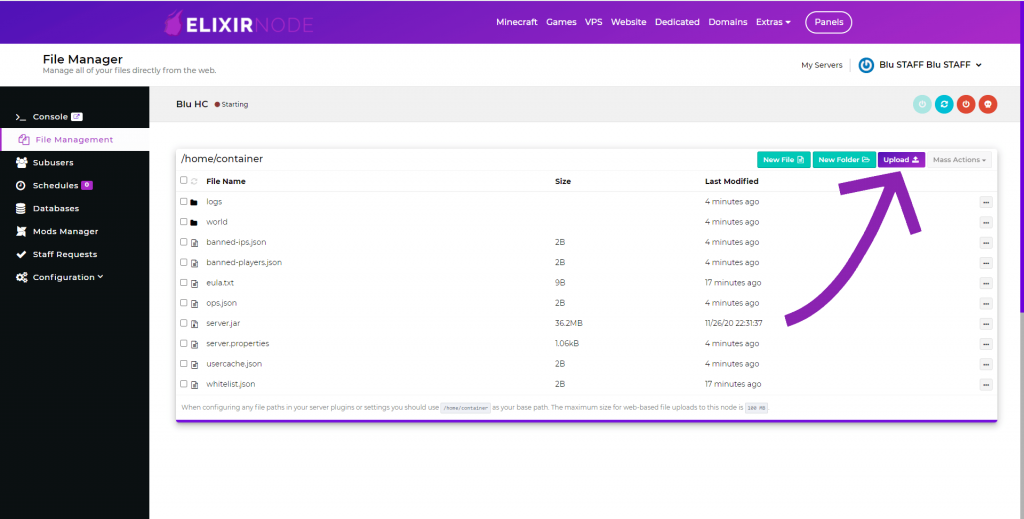
You will now be presented with your server overview page, navigate to the button called “File Management” and press it and then to “Upload” and press it.

STEP 3
Before you upload your server icon you will need to make sure that is 64×64 pixels in resolution, a resolution any higher or lower will not work and cause your server to display the default server icon. It will also need to be in the .png file format or else it will cause the same problem. The last thing you need to do to make sure that your server icon is ready for is to rename it to “server-icon“ which can easily be done by right-clicking the file and pressing “rename“.

STEP 5
Once the file is uploaded you will now see it in the server file directory. The final step now it to restart your server by pressing “restart” button just above the file directory for the server icon update to take place.
You can see a before and after here:

Now your Minecraft server has a custom icon!
If you still need help or have any issues feel free to contact us.

