This article will show you how to install WordPress which an easy to use Free Software Content Management Systems (CMS) you can install on your VPS. It is very secure and easy to install just requiring Webserver, Database, and PHP. You can even run WordPress on a Budget-2 VPS. WordPress is perfect for using a VPS for web hosting. Also we are one of the cheapest vps hosting providers that has vps hosting with unlimited bandwidth so don’t worry about having too many visitors or bandwidth fees! ElixirNode is designed to have the best vps for hosting WordPress at the best price.
Server Preparation
The First step is log into your VPS. Then you need to run this command to install your LAMP stack.
sudo apt-get install apache2 php mariadb-server mariadb-client libapache2-mod-php7.4 php-mysql php-xml php-cli php-fpm php-cgi php-curl php-gd php-pear php-imap php-pspell zip unzip

The second step is to create a MariaDB Database on your VPS hosting.
Enter
sudo mariadb -u root
and press enter (be sure to be using sudo if not logged into root).
CREATE DATABASE wordpress;
Press enter
GRANT ALL PRIVILEGES ON wordpress.* TO "wordpress"@"localhost" IDENTIFIED BY "set_password_here";
BE SURE TO CHANGE THE PASSWORD AND REMEMBER IT! Press enter.
FLUSH PRIVILEGES;
Press enter.
EXIT
Press enter.

To finish the preparation, Run
cd /var/www/html
and then run
wget https://wordpress.org/latest.zip
If that does not work you can download it from this page and use scp/sftp to upload it. Run
unzip latest.zip
then run
cd wordpress/ && mv * ..
Once again run
cd .. && chown -R www-data:www-data * && rm -rf wordpress
to set the permissions. Also run
mv index.html index.html.old

Before going to the installation, you may want to set up Let’s Encrypt SSL
Htaccess is also very important run
sudo nano /etc/apache2/sites-available/000-default.conf
to edit the file and add in the following two spaces below DocumentRoot
 <Directory /var/www/html>
Options Indexes FollowSymLinks
AllowOverride All
Require all granted
</Directory>
Press Ctrl+o and Enter to save and Ctrl+x to exit and then run
systemctl reload apache2
This is the last step you need to do on your vps for hosting the WordPress itself, now we continue to the web interface.

WordPress Setup
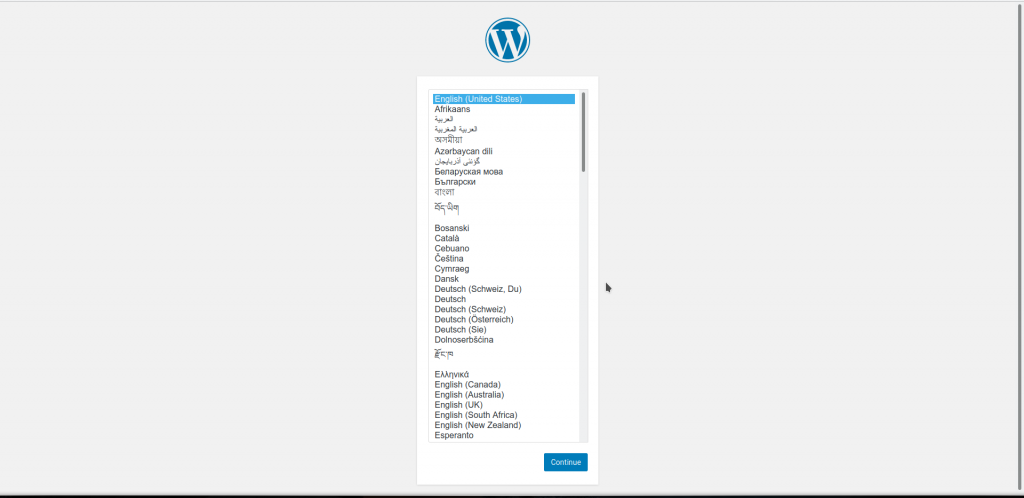
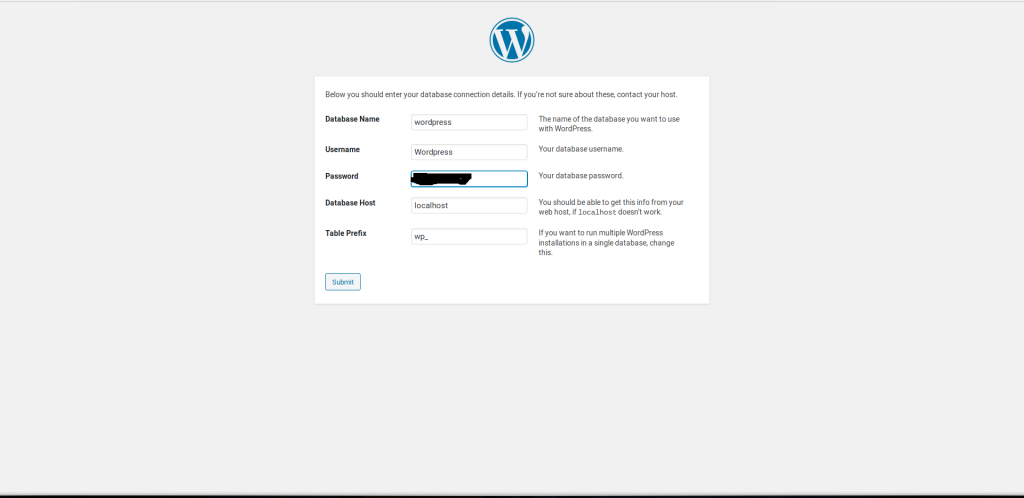
Now that WordPress is ready, go to http://your-domain.tld/ to start the wordpress setup process. This will include your Database connection and admin creation.
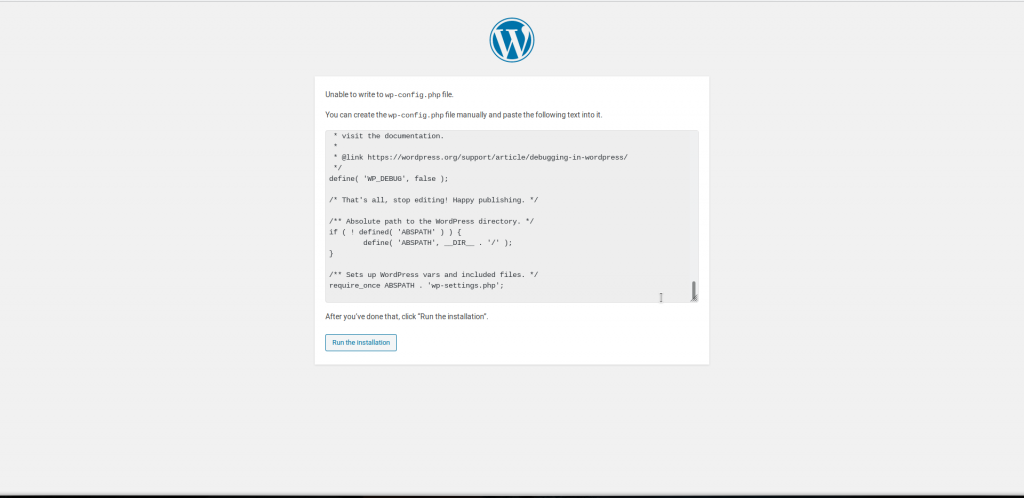
Go back in your terminal and run
sudo nano wp-config.php
and copy and paste the text from the box above from wordpress. Then press ctrl+o to save and ctrl+x to exit. Go back to WordPress and click “Run the Installation”

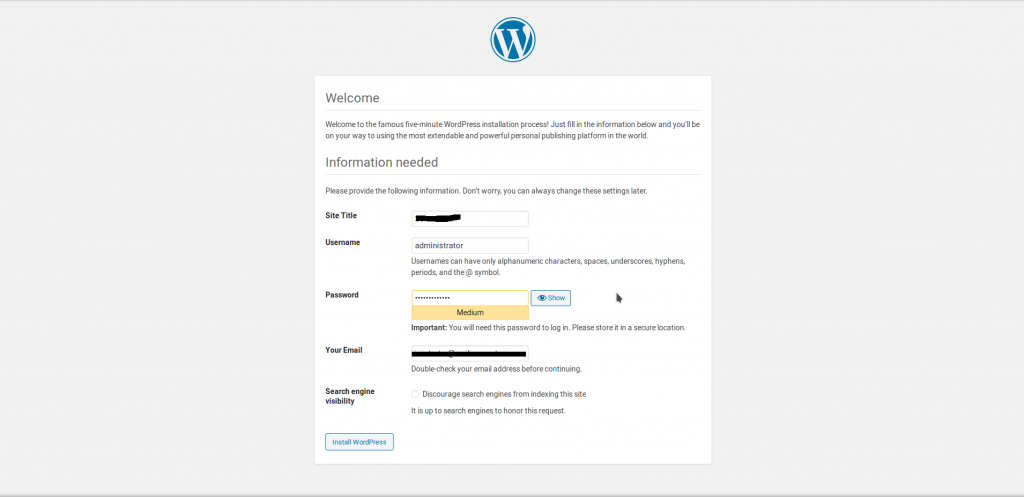
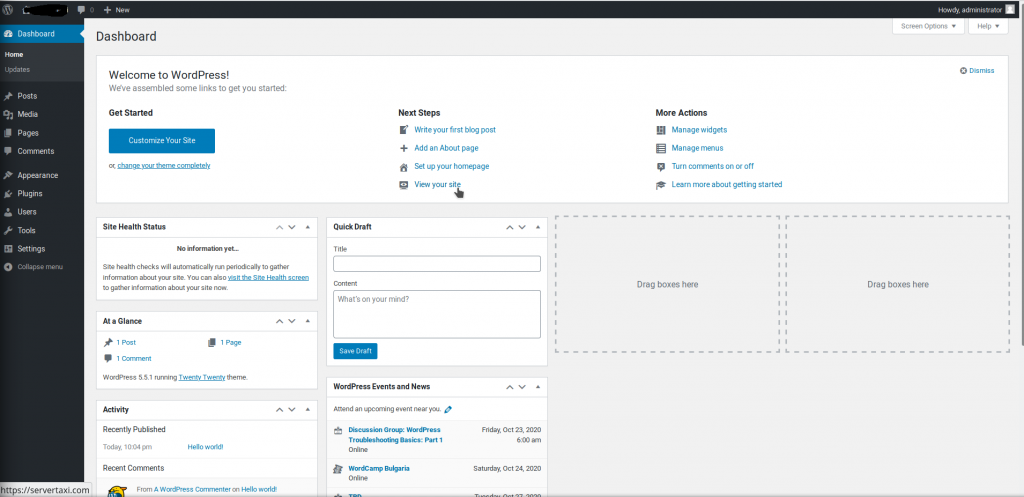
Click Install WordPress and that’s it! It will take a minute or two but after that you should see a success page and be able to login! Have fun with your new site!
Remember, we are one of the best vps for hosting any web applications and one of the best vps hosting providers around so if you are looking for a vps feel free to check out our vps hosting offerings!
If you have any questions or need any help then contact us.

