CS:GO, also known as Counter Strike Global Offensive, is a free to play multiplayer first person shooter game, with over 20 million unique players every month. This article will show you how you can setup your ElixirNode CS:GO server hosting with the “Retakes” plugin.
CS:GO Retakes is a special plugin for CS:GO that adds a new gamemode to the game. According to the plugin developer, “The idea is that the [terrorist] players spawn in a bombsite with the bomb, while the [counter-terrorists] spawn on rotation routes and try to retake the site and defuse the bomb.”
You can read more about CS:GO Retakes here.
Retakes servers have been around for a few years by now, and have been slowly rising in popularity as they are a fun gamemode to play on if you just want to have fun with your friends! It can also be a fun server you can host to practice and improve your skills in CS:GO!
There are hundreds of these servers out there, but why not host your own? You can customize all the settings to your liking. You can install your own plugins alongside retakes. You can even whitelist and private the server, meaning you can only play on the server with your friends or other specific people!
Retakes also has some fun addon plugins that you can enable to spice up your gameplay! You can read more about them here.
Enough explanation, this article will show you how to install Retakes onto your ElixirNode CS:GO server host!
STEP 1
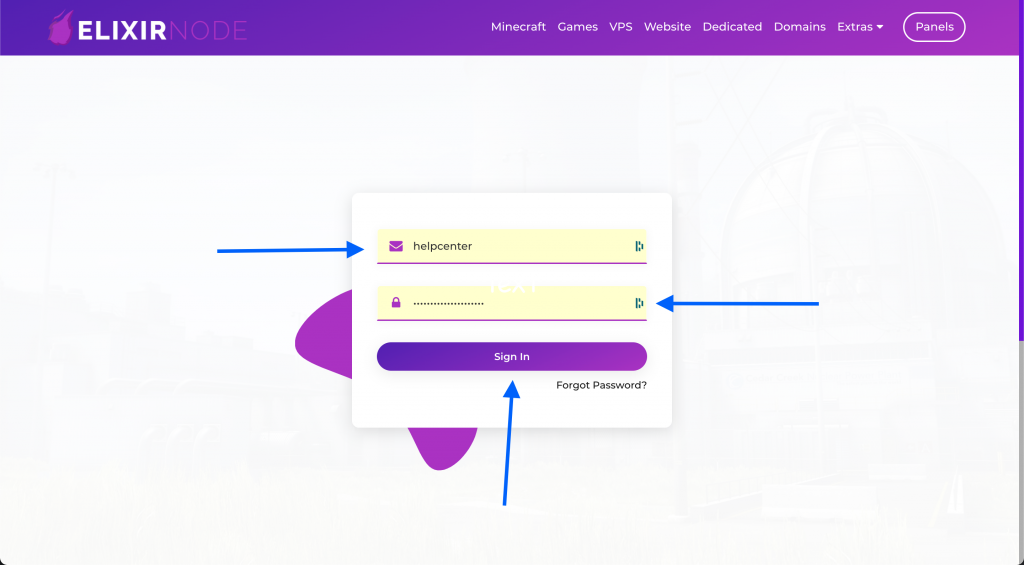
Login to the Game Panel here.
STEP 2
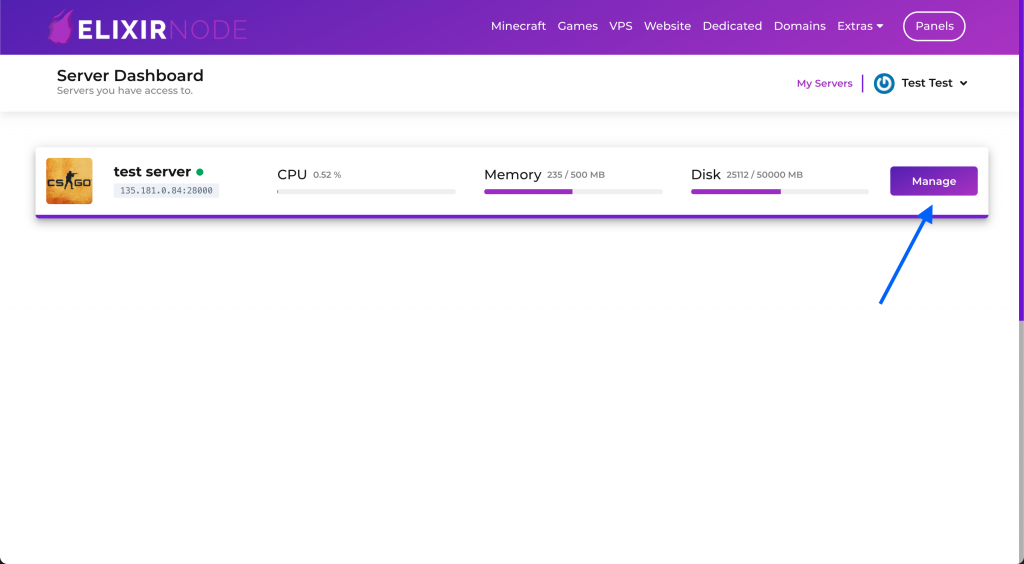
Choose the server you want to install Retakes on, and press “Manage” next to it. If you don’t already have an ElixirNode CS:GO hosting, you may purchase one here!
STEP 3
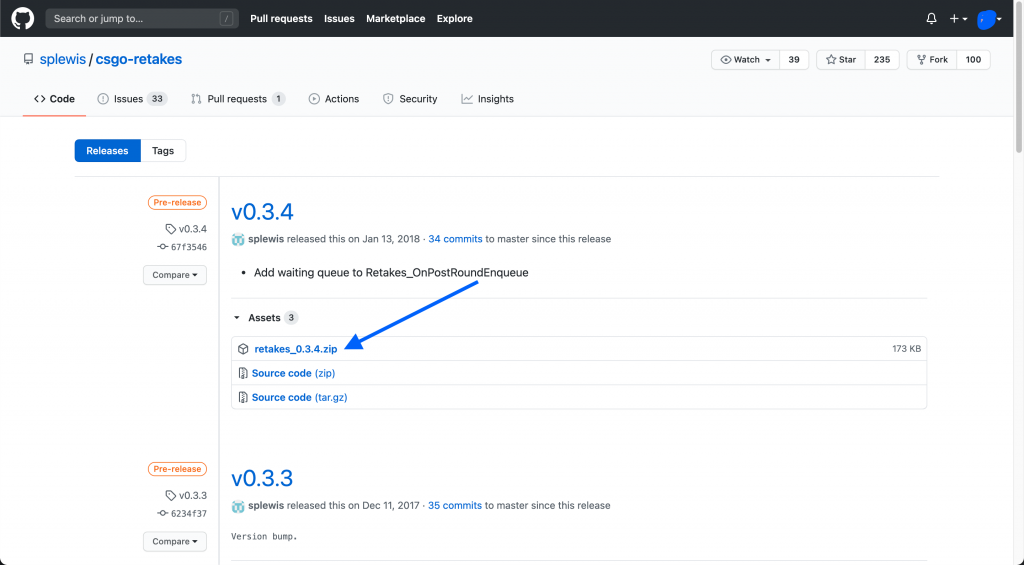
Download the “Retakes” plugin by going here and clicking the latest “.zip” file. You will also need to download “Sourcemod” if you don’t have it already. You can download that here.
STEP 4
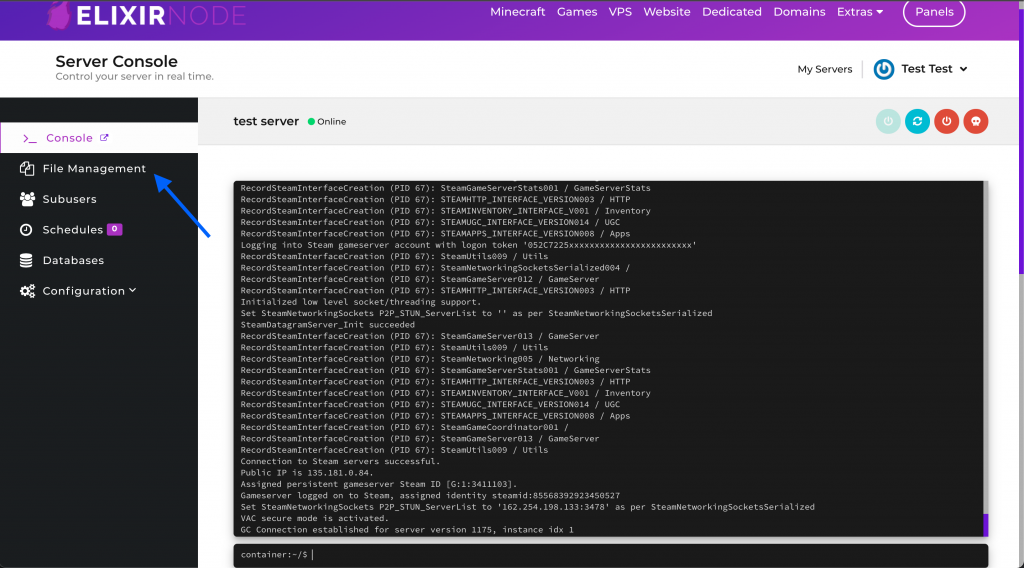
Go back to the Game Panel, and click “File Management” on the left hand side panel. You will be brought to the File Manager where you can manage your CS:GO server host’s files.
STEP 5
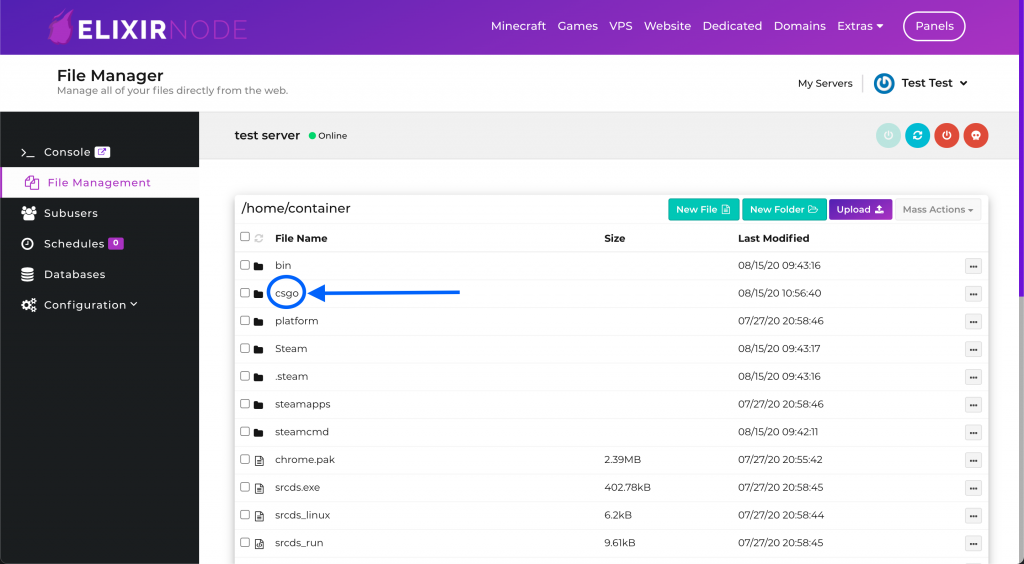
On the “File Management” page, click the “csgo” folder. This is where you will be uploading the files.
STEP 6
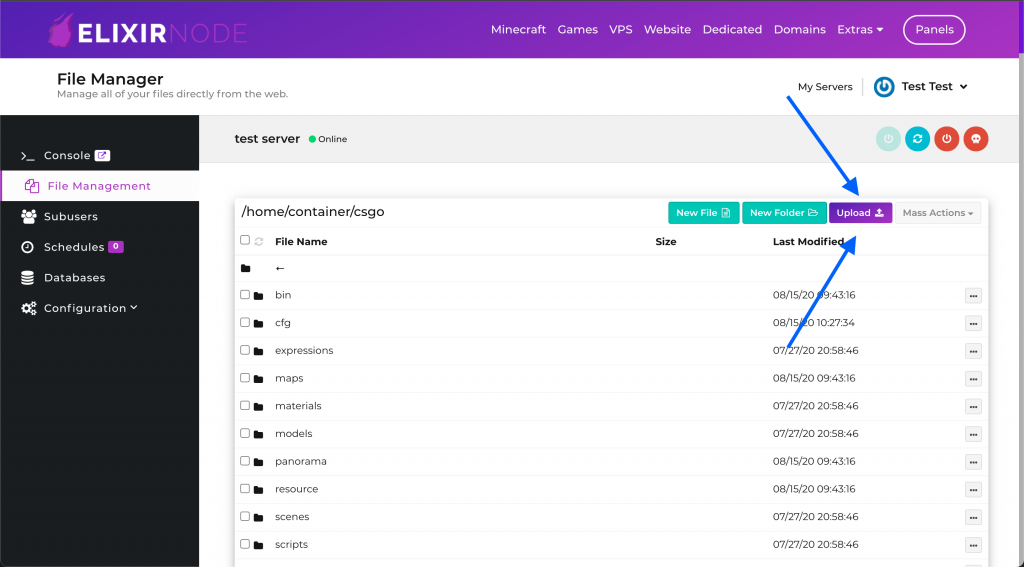
Press the “Upload” button, and choose the retakes zip file that you downloaded in STEP 3. If you downloaded Sourcemod, you can also upload that here. Make sure you are in the “csgo” folder. Compare the files you see in your game panel to the image below just to be sure.
STEP 7
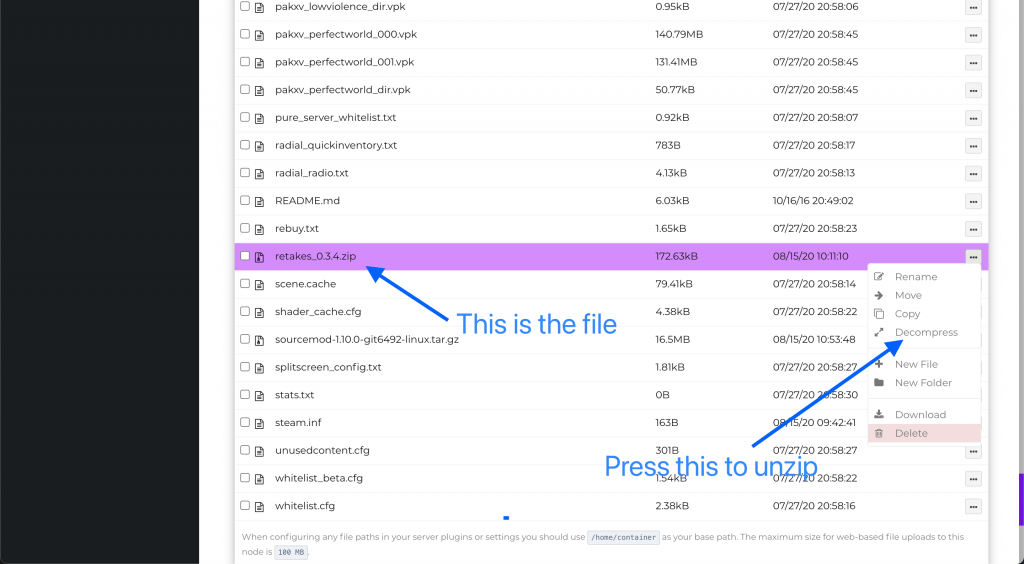
Once the zip file is properly uploaded (this should only take a few seconds), reload the page. Find the “retakes-VERSIONNUMBER.zip” file, and press the three dots on the right hand side next to the file, and click “Decompress.”
If you uploaded the Sourcemod file, find the “sourcemod-1.10.0-git6492-linux.tar.gz” file, and do the same as you did with the zip.
STEP 8
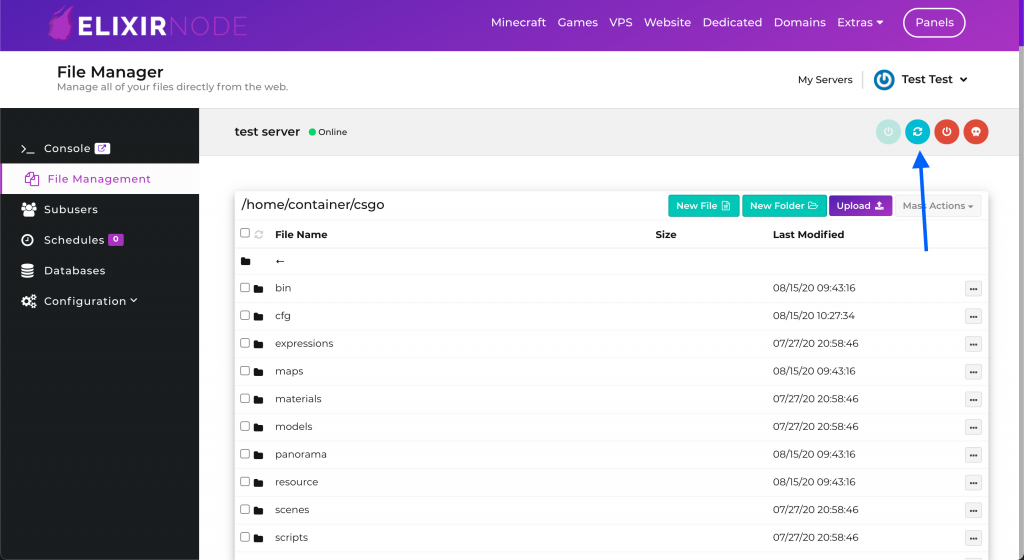
Restart your CS:GO server.
Enjoy! If all goes well your retakes server should be up and working!
We hope you enjoy your Retakes server! Here are some fun tips to improve your experience:
– If this is a public Retakes server, you can post your server on some public server lists. Here is a server list to get you started!
– If this is a private server for you and your friends, you might have some fun by making use of some in-game commands to troll your friends!
– You might also enjoy making a discord server for your CS:GO Retakes server, so you can talk and voice chat with players of your server!
– You can modify the config files located in the folder “csgo” > “cfg” > “sourcemod” > “retakes”. There are two useful config files in there, retakes.cfg and retakes_game.cfg. Play around with the settings!
If you still need help or have any questions then contact us.

