This article will show you how to install Forge onto your Minecraft server hosting. Note: It is recommended that you start with a fresh new world to prevent any compatibility issues. If you already have an existing world, check out this article to do a “world reset”. If you are
This article will show you how to install Forge onto your Minecraft server hosting.
Note: It is recommended that you start with a fresh new world to prevent any compatibility issues. If you already have an existing world, check out this article to do a “world reset”. If you are just starting out and do not have a world generated yet, do not worry! Upon starting up your server for the first time, a world will be generated for you based on your “server.properties” file.
STEP 1
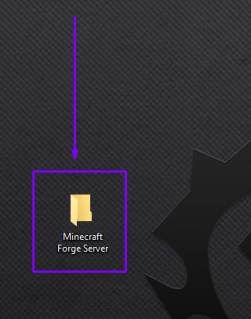
Create a folder somewhere on your desktop or at an easily accessible location. Name this folder whatever you’d like, as long as you know that this is designated for the contents of your server. For this example, I have created a folder named “Minecraft Forge Server” located on my desktop.
STEP 2
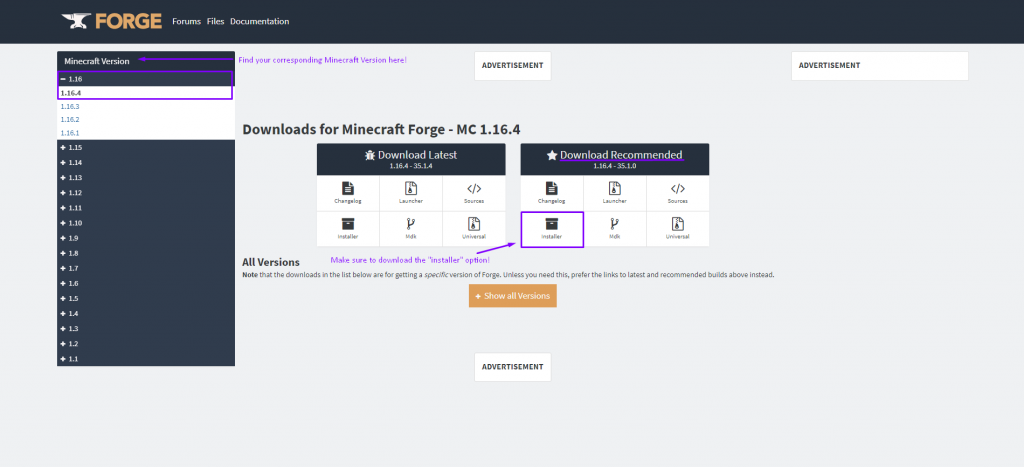
Visit the Minecraft Forge page and choose the version of Forge your server will be running. Make sure that the version of Forge you download is compatible with the mods or modpack you will be playing. For instance, if you wanted to run the modpack RLCraft, then you would need to download Forge for 1.12.2. You can find all the versions of Forge on the left hand side menu panel. Once you have selected the version of Forge you’d like to run, find the recommended Forge version available and download the “installer” option.
STEP 3
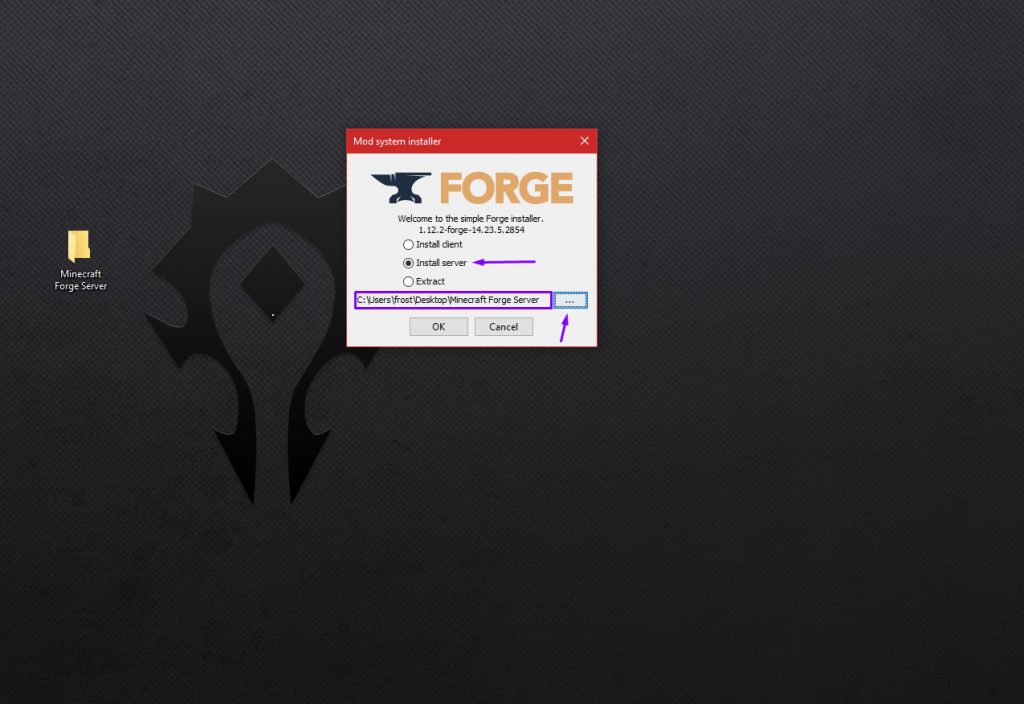
Once you have downloaded the “installer” option, keep the file and run it. Once you run the program, you should see a window pop up leaving you three options to choose from. Select “Install Server” and then click the three dots button at the bottom right to choose which folder you’d like to install the contents to. In this example, I have it directed to the “Minecraft Forge Server” folder I made earlier. After you have double checked everything, press the “OK” button.
STEP 4
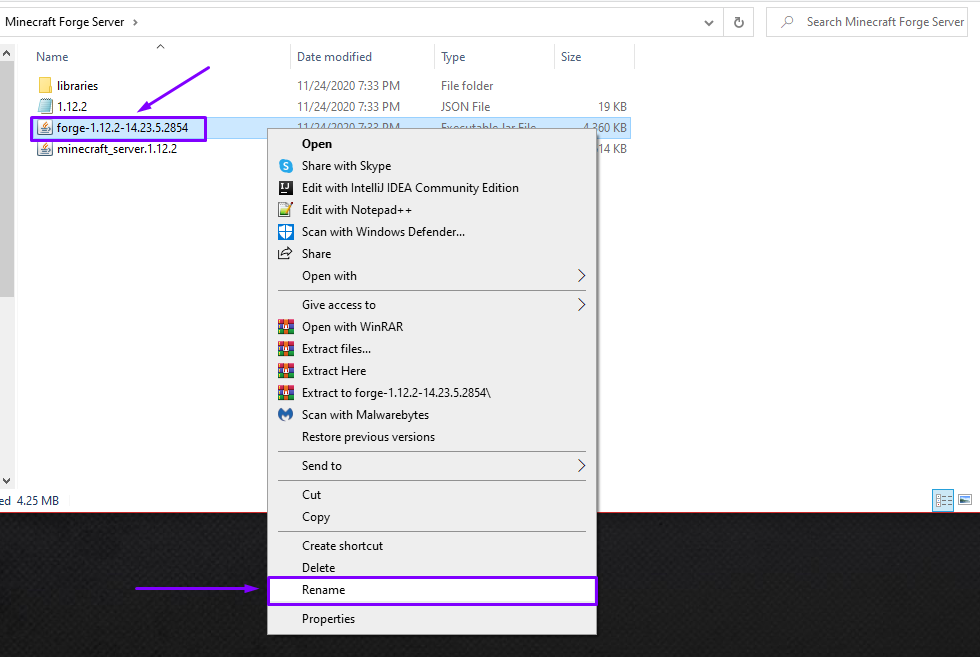
Open up the folder you installed all the contents to and you should see four files. Find the “forge-1.xx.xx” .jar file, right click it and choose the rename option, then rename this file to “server”. You do not need to put “.jar” after the name as the file is already a .jar extension. For my example here, since I installed Forge version 1.12.2, the .jar file I am looking for is named “forge-1.12.2-14.23.5.2854”.
STEP 5
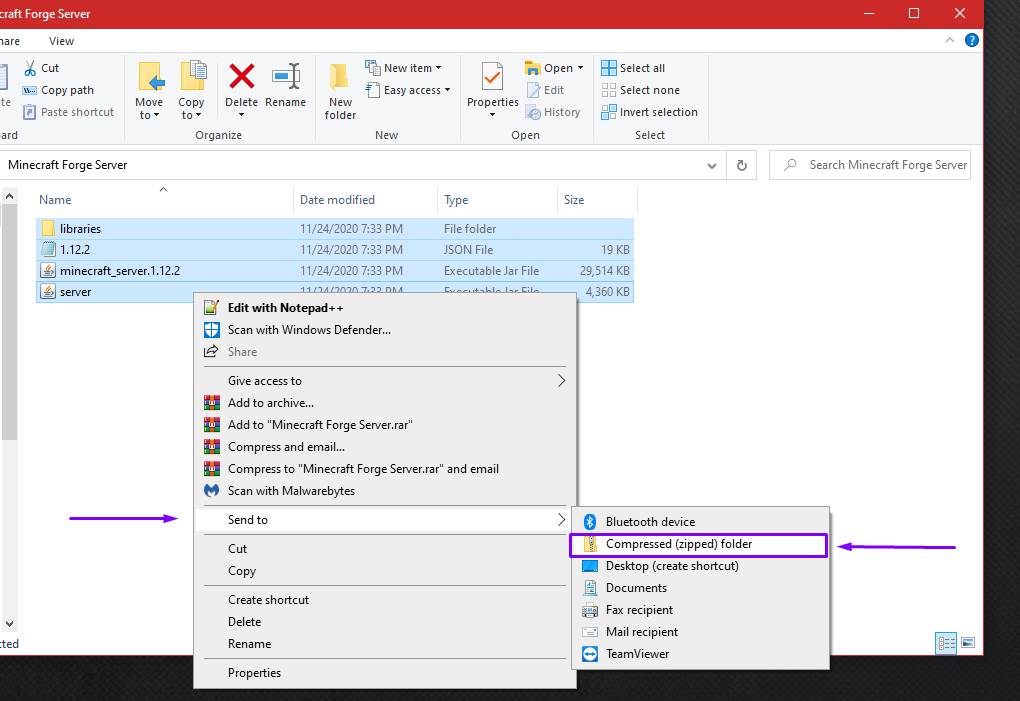
Now that you have renamed the “forge-1.xx.xx” .jar file to “server”, select all the contents in the folder and then right click in the highlighted area. Quick Tip: You can quickly select all the contents by pressing “Ctrl + A”.
Go to “Send to > Compressed (zipped) folder”; this will compress all the files selected into a “.zip” file. If you are using a file compression program such as WinRar, note that “.rar” files will not decompress in ElixirNode’s game panel, you must use a “.zip” file!
STEP 6
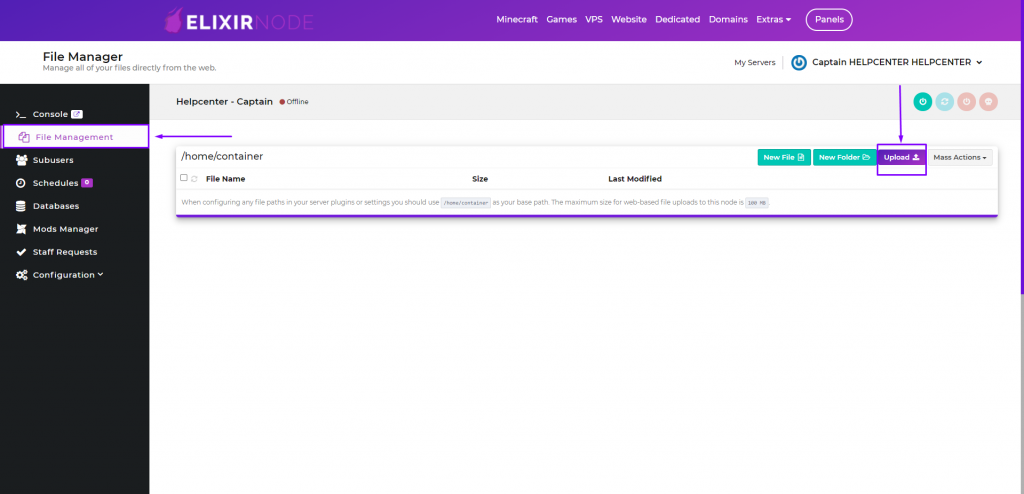
Login to the game panel and make sure your server is turned off. Then, go to the “File Management” page and press the “Upload” button located at the top right. Locate the “.zip” file that you created which holds all the contents in your server folder and upload it to the “File Management” panel. The file by default should be located in your server folder, unless you moved it somewhere else.
STEP 7
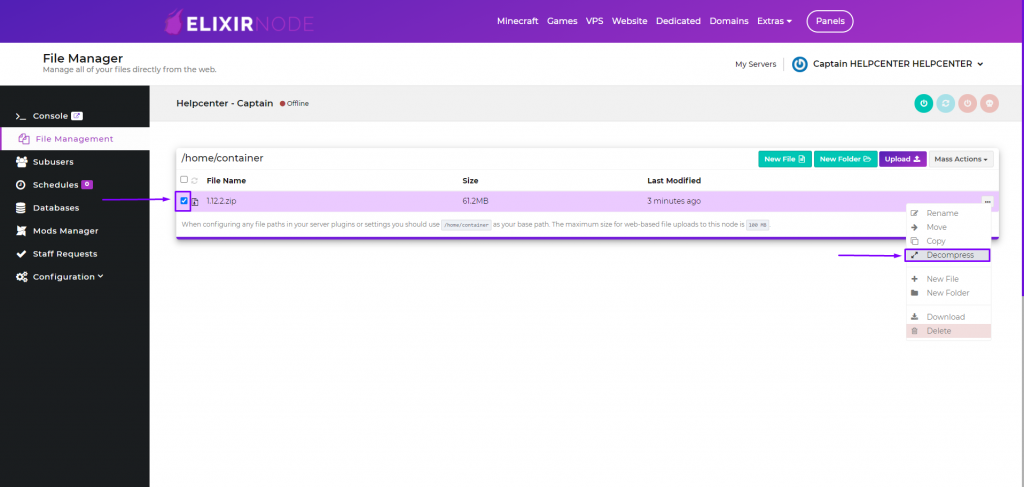
After you have uploaded your “.zip” file onto the server, select the “.zip” file by checking the box to left. Click the three buttons to the right of the selection and choose the “Decompress” option. This will now unpack all the contents you zipped, and you are free to delete the “.zip” file from the “File Management” panel unless you need it.
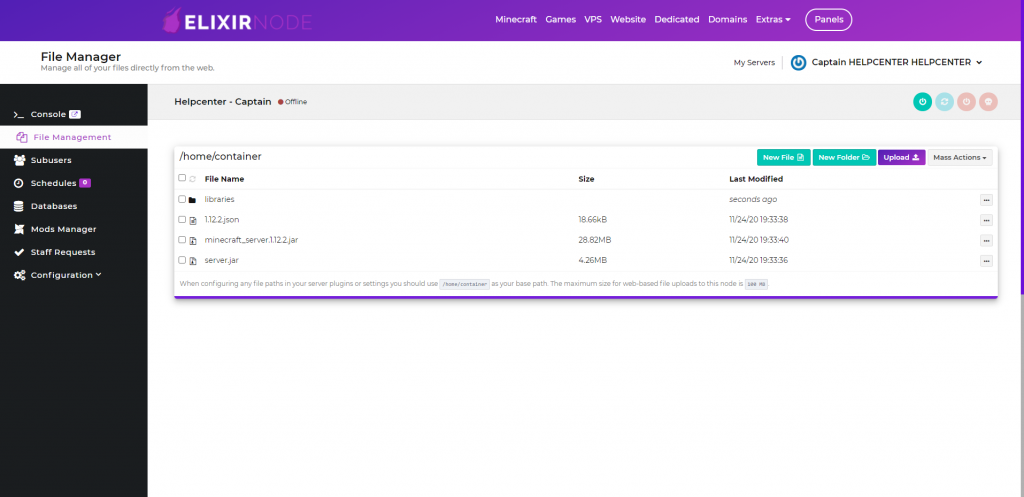
Note: Your “File Management” panel should now look similar to this!
STEP 8
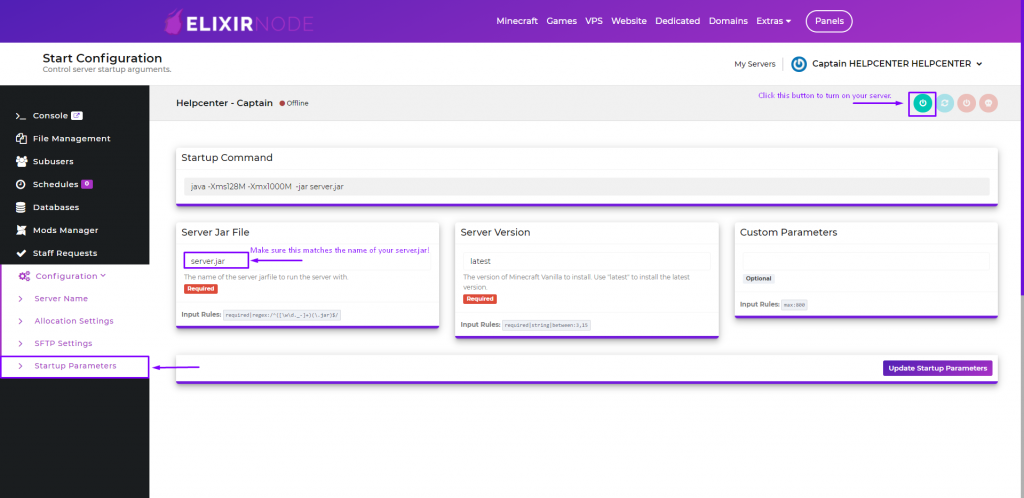
Now that you have successfully transferred over your server files, go to “Configuration > Startup Parameters” and make sure that the text in the box under “Server Jar File” matches the name of your “server.jar” file. You can then press the “power button” at the top right to start up your server.
STEP 9
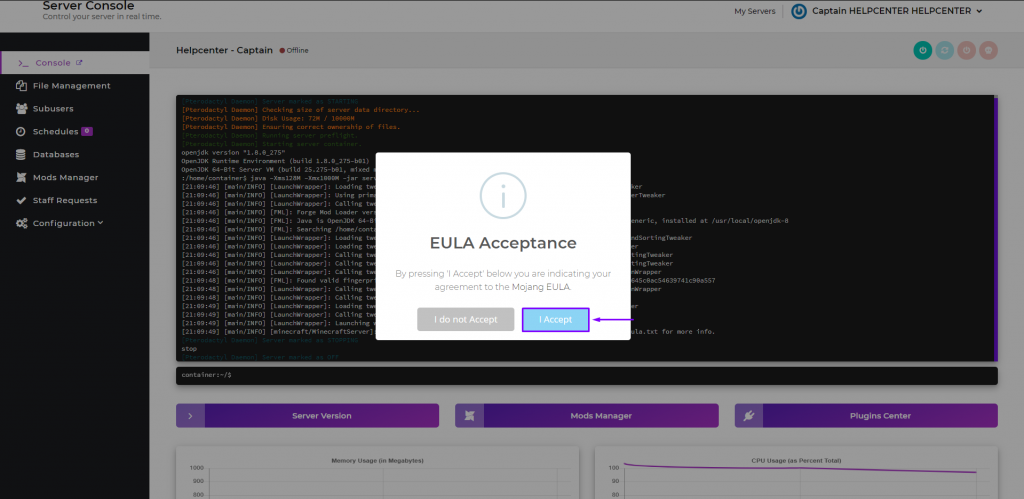
Upon starting up your server for the first time, you will be prompted to accept Mojang’s EULA. Simply press “I Accept” and the server will restart and generate all the necessary files in your “File Management” panel.
STEP 10
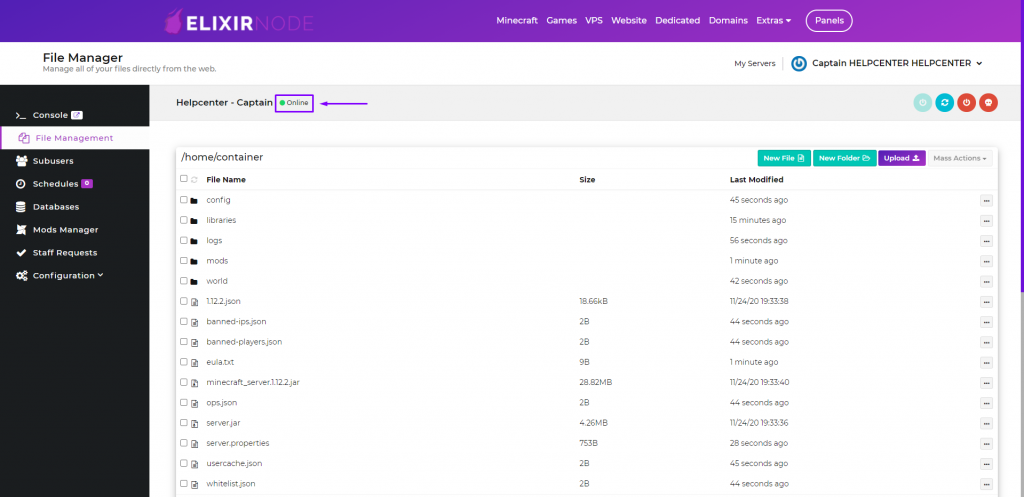
Going back to your “File Management” panel, you should now see something similar to this. The green icon that says “Online” indicates your server status. Your Minecraft Forge server is now set up!
Have any questions or concerns? If you still need help, feel free to contact us.
FREE game server, VPS, web host, dedicated IP & more on most plans!
Get Started