After setting up your VPN server with SoftEther VPN on your ElixirNode VPS hosting to secure your internet then it’s obvious that you would want to block bad advertisements that tack you and get in your way. This article will show you how to setup ad blocking on your VPS hosting running softether! PiHole is the best since it is well known and has a lot of features. It is a DNS level blocker making it very hard for many ads to get through. Another added benefit of using PiHole with a VPN is that it will encrypt your DNS queries without any additional setup. PiHole is great and will run very smooth on your VPS hosting from ElixirNode! ElixirNode is one of the best vps hosting providers for this setup since it is tested and we know it works. You can read about the comparison of our two VPS plans here!
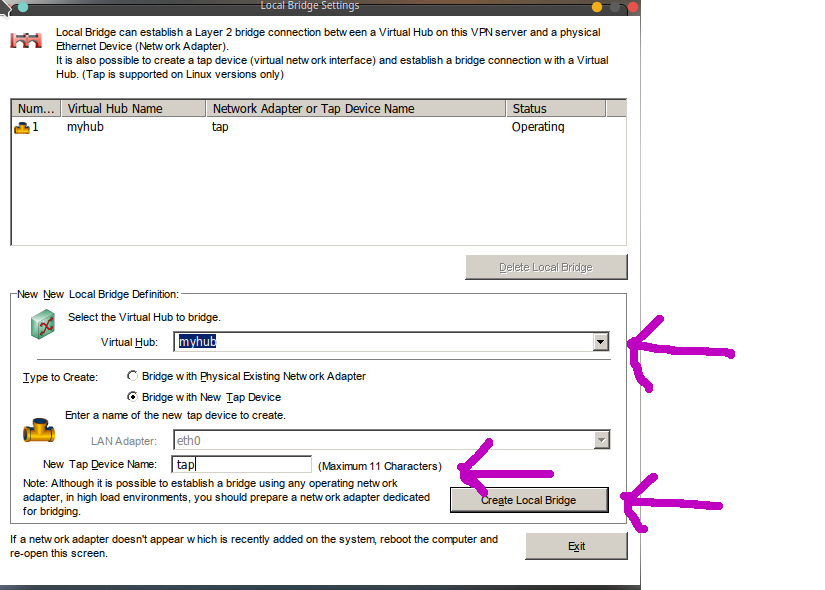
First Open up the SoftEther server manager GUI on your desktop and connect to your server. Click on Local Bridge Setting in the bottom left in that menu, Select myhub from the Virtual Hub list, then select the Bridge with New Tap Device and name it tap. Then login to your server via ssh and run
dhclient tap_tap
to assign an IP address to the tap adapter. Run
ip a
to get the IP of tap_tap. Usually by default it is
192.168.30.10
and that is what you want it to be since it is the first IP the DHCP server leases. You will need to run the dhclient command on every boot of your server unless you add it to the vpnserver startup.
Run these commands to start the PiHole installation
wget -O basic-install.sh https://install.pi-hole.net
sudo bash basic-install.sh
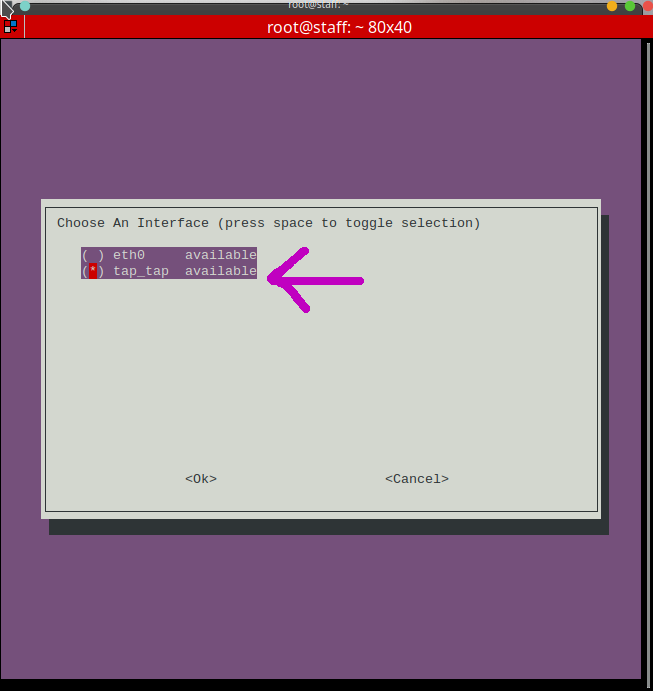
Go through the first few pages until you get to the options. You can navigiate the options by using the arrow keys to move, space to select an option, and tab to highlight Ok or Cancel and Enter to accept the option. For the first step. Select
tap_tap
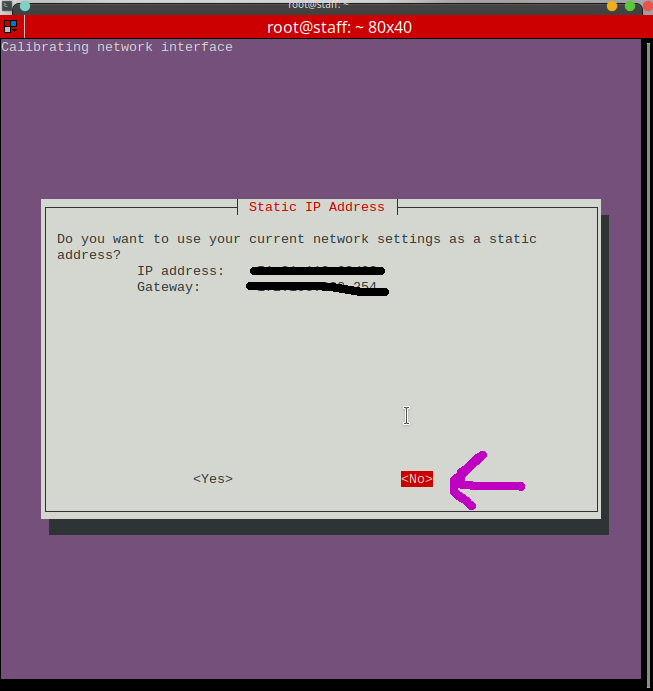
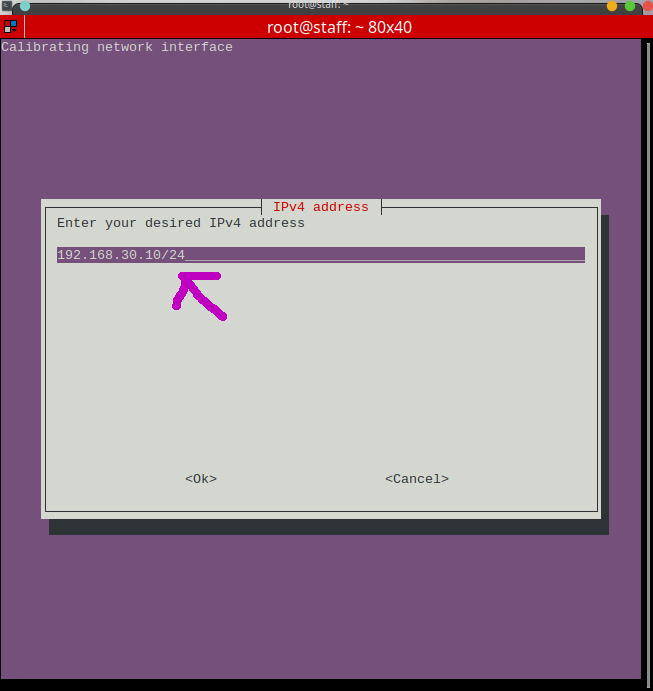
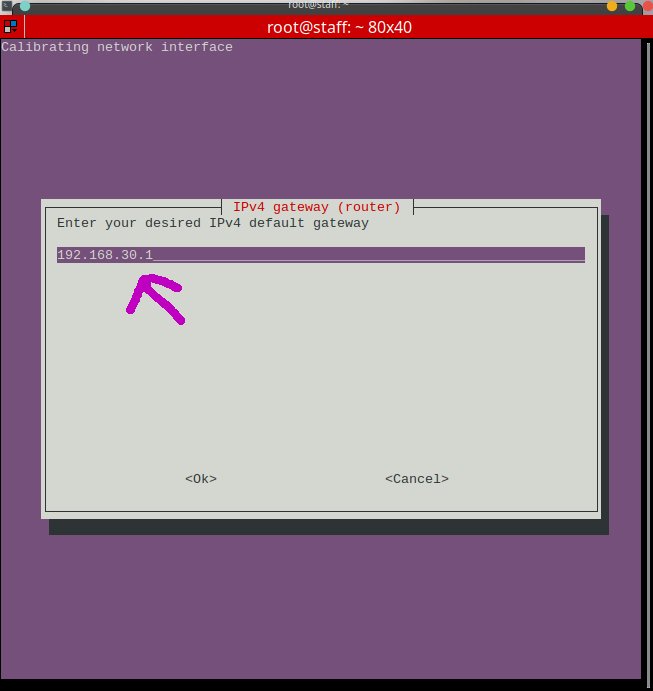
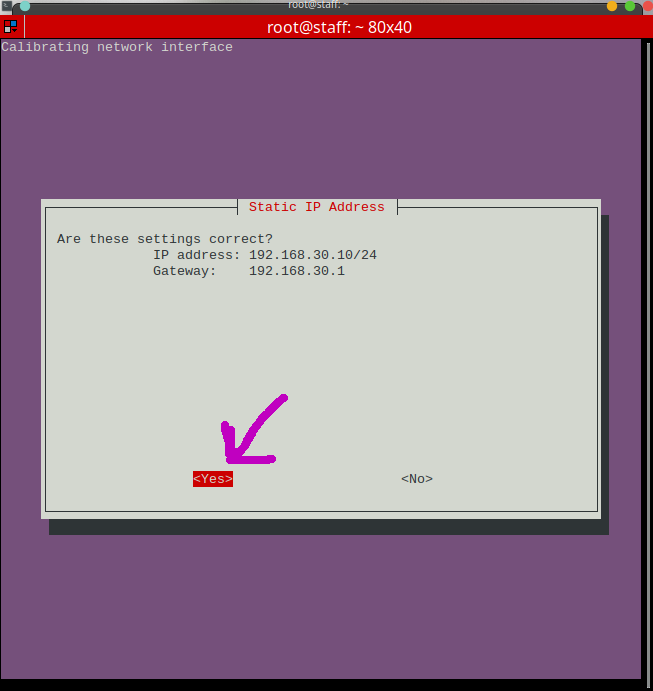
by highlighting it and hitting space. Then press enter. Go through the other pages and match the images to ensure PiHole running on your local vps hosting is configured properly.
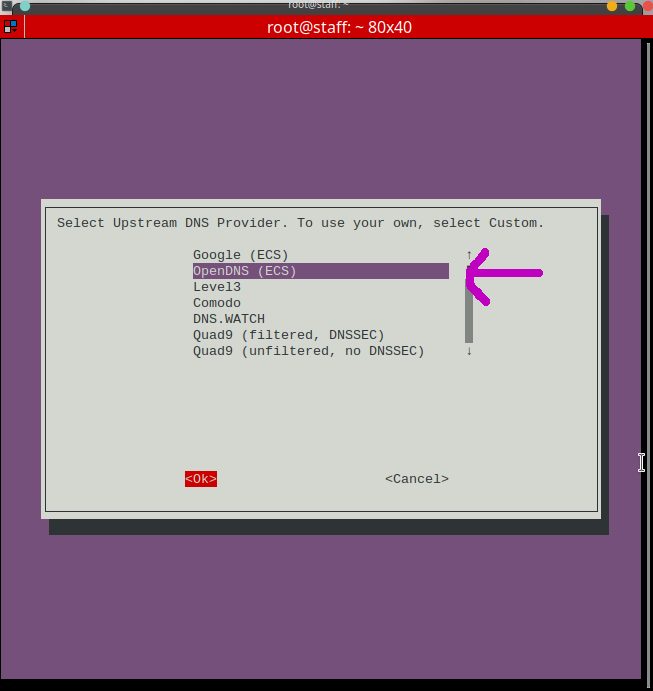
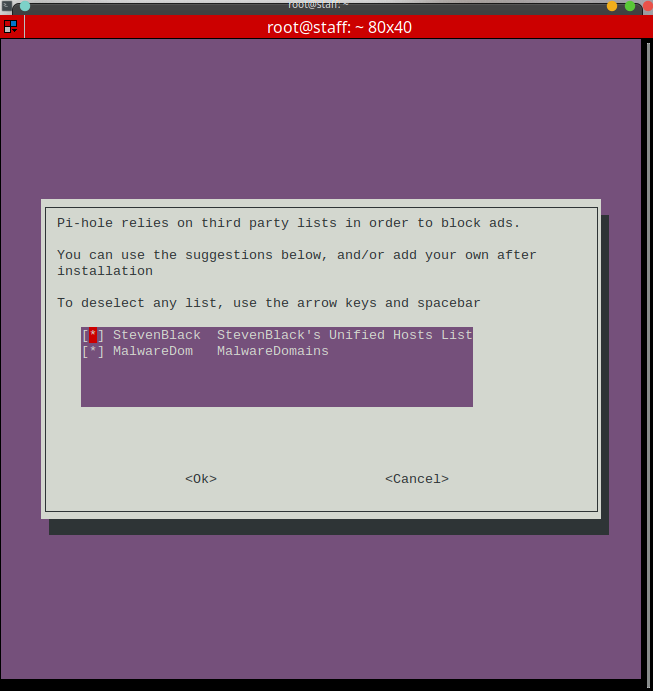

You will need to change the IP addresses. So be sure to select NO so you can change the addresses.
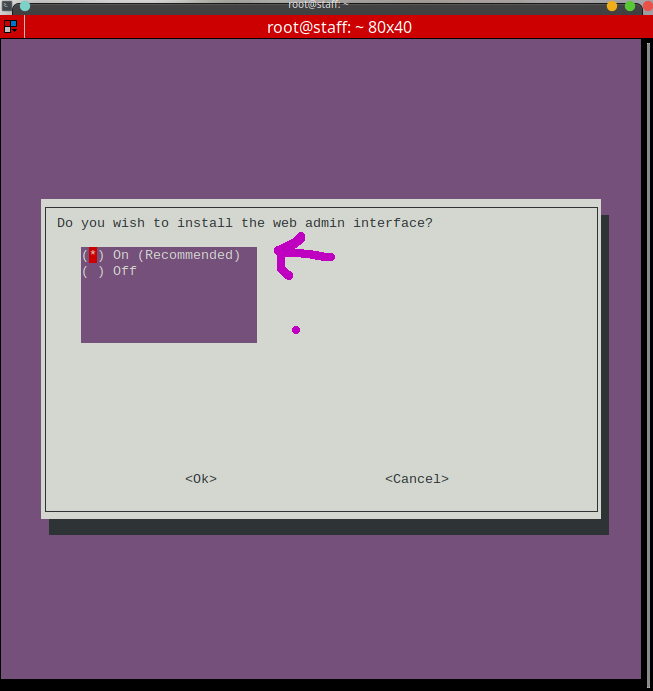
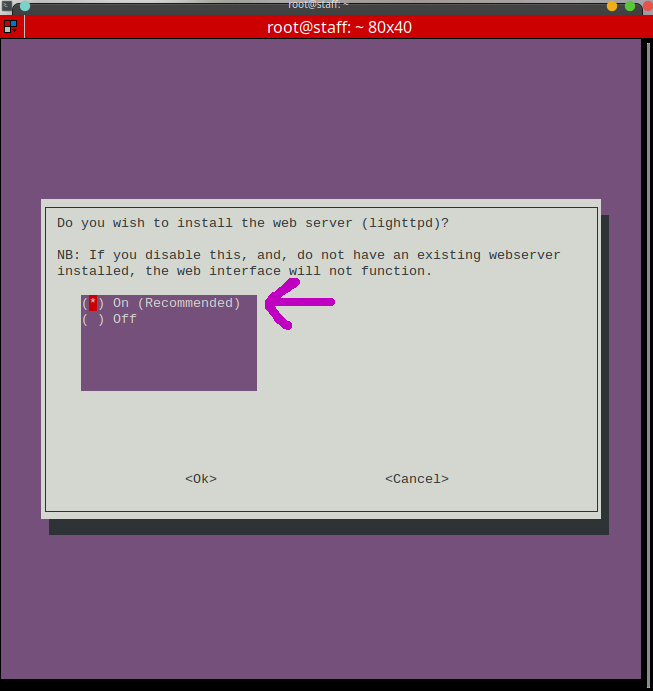

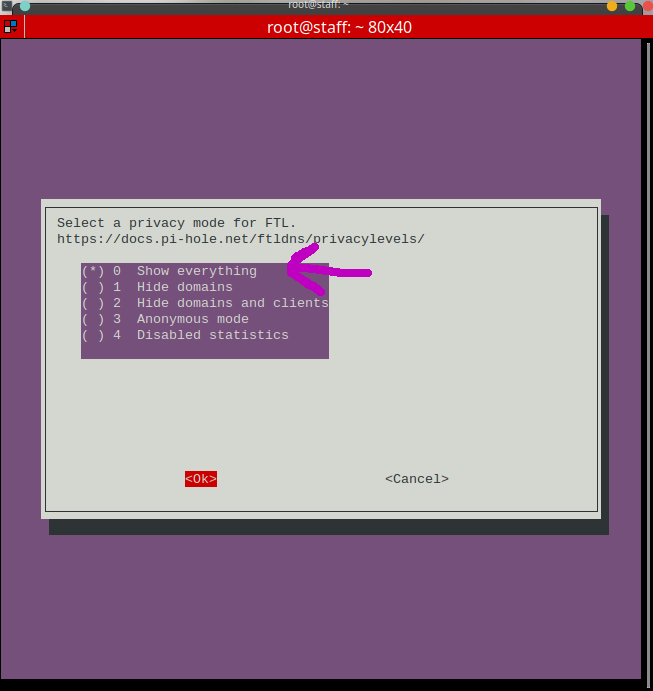
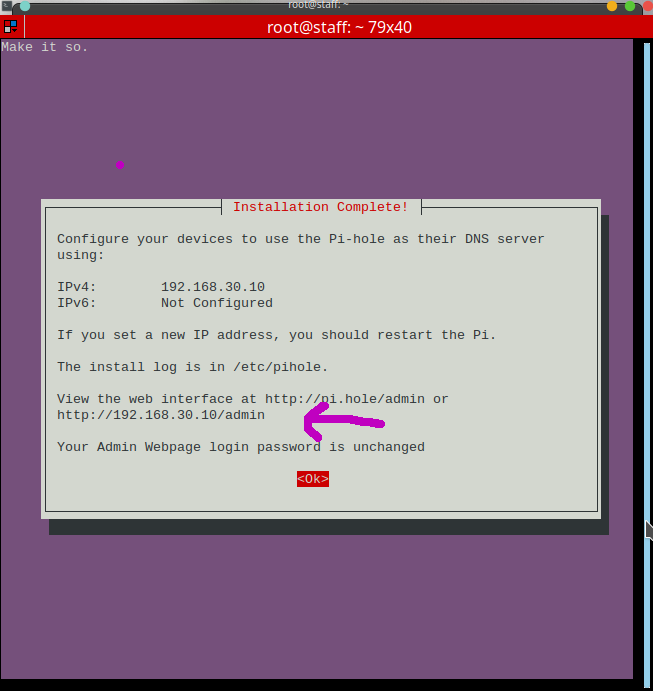
After going through all of that change your panel password to whatever you want using the
pihole -a -p
command.
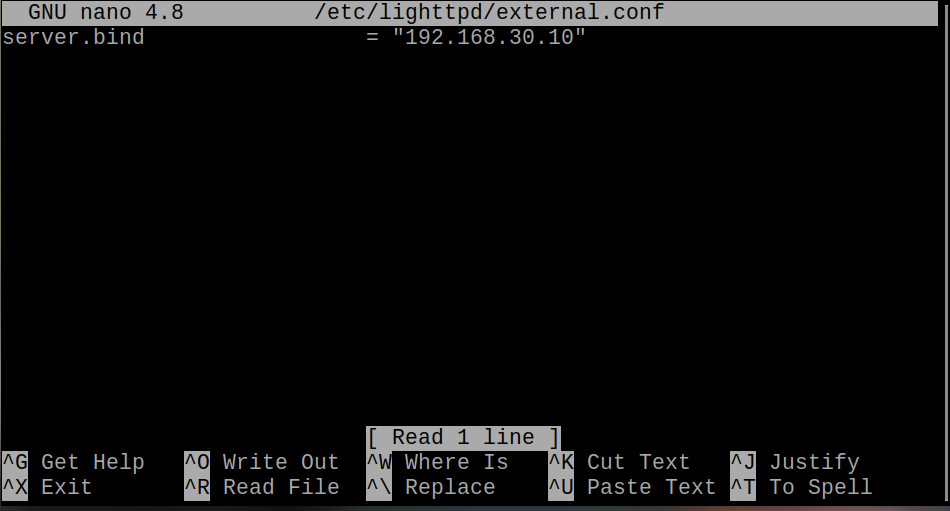
You can also secure the web interface by editing the
/etc/lighttpd/external.conf
and inserting
server.bind = "192.168.30.10"
to restrict admin panel access to users connected to the VPN. Now lets setup SoftEther VPN server to use the new DNS server. This will allow you to restrict access to the Web UI to users connected to the VPN running on your Virtual Private Server.
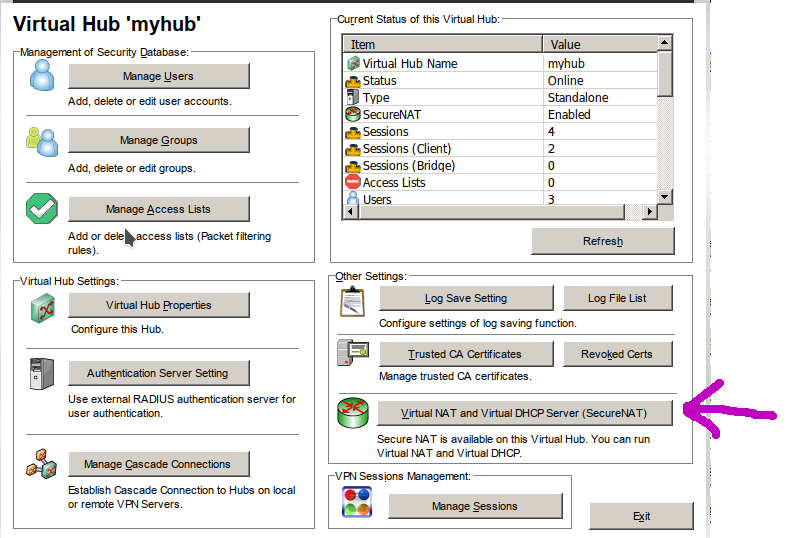
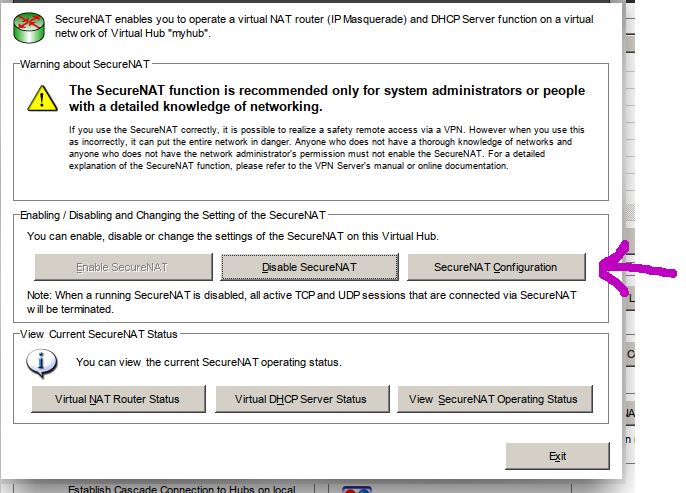
If you are not using a external DHCP server, All we need to do in SoftEther is change the Hub’s DNS settings Manage Virtual Hub while selecting myhub, in that menu select Virtual NAT and Virtual DHCP Server (SecureNAT). Then Select SecureNAT Configuration.
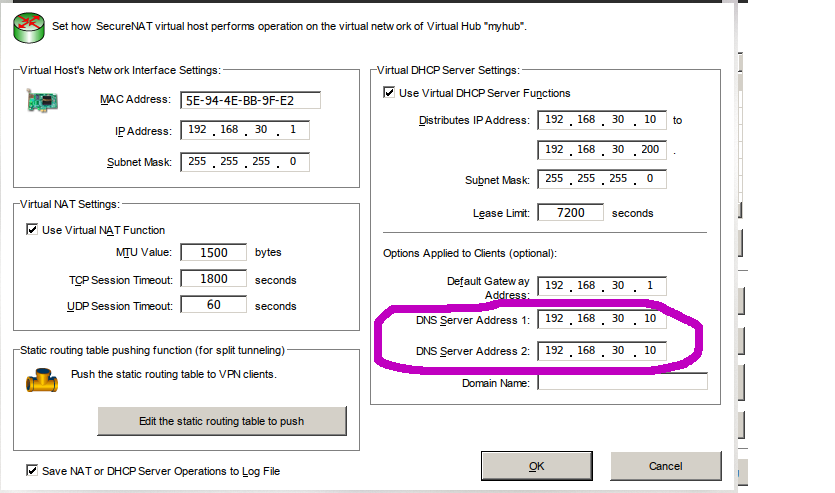
Set the IP of the DNS server in the DNS boxes. In this tutorial we set it as
192.168.30.10
. Once done click Ok and exit. If connected to your VPN server disconnect and reconnect. If all goes well you should be able to browse the web mostly ad-free without having to install an ad-blocker on the device.
Enter
http://192.168.30.10/admin
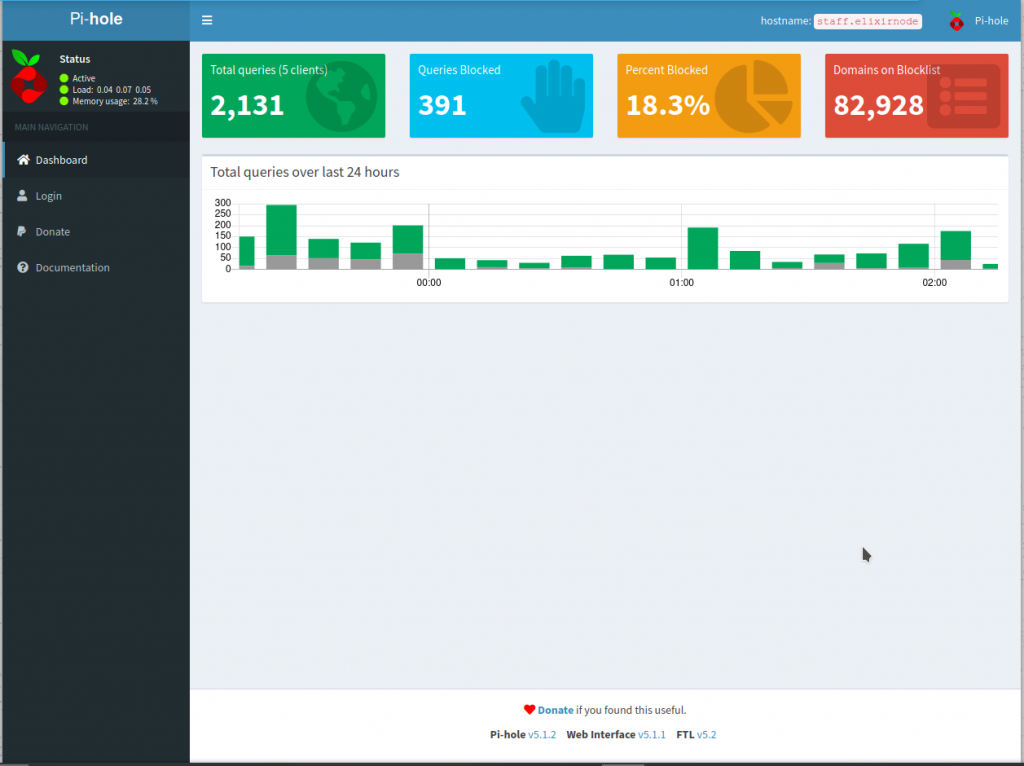
in your web browser while connected to your VPN. You can now see how many queries have went through your server and how many Ads have been blocked. Log in with the password you created to manage the server. Even our most cheap VPS can handle PiHole without any slowdowns so there should be no reason why you wouldn’t want to run it.
PiHole also has a built in Dynamic Host Configuration Protocol (DHCP) server that can replace SoftEther’s SecureNAT feature. I may get to this later.
If you have any further questions or still need help, contact us.

