Installing plugins is a must for every Minecraft for hosting server owner! There are multitudes of plugins out there to give yourself the best Minecraft server hosting experience! Plugins provide your server with additional functionality, such as litebans plugin that can hook into a website hosting, cosmetics, mounts, suffixes, crates,
Installing plugins is a must for every Minecraft for hosting server owner! There are multitudes of plugins out there to give yourself the best Minecraft server hosting experience! Plugins provide your server with additional functionality, such as litebans plugin that can hook into a website hosting, cosmetics, mounts, suffixes, crates, and everything else you could possibly think of! Plugins are essential for running specialized game modes such as skyblock, factions, prisons, and minigames. You can find plugins for just about everything on Spigot, make sure to also check out the top 25 premium plugins if you have the budget for it! Additionally, if you only need to connect to SFTP then you can find you will find our simplified SFTP tutorial to be easier. With that out of the way, let’s dive in!
#1: Installing plugins through the filemanager
STEP 1
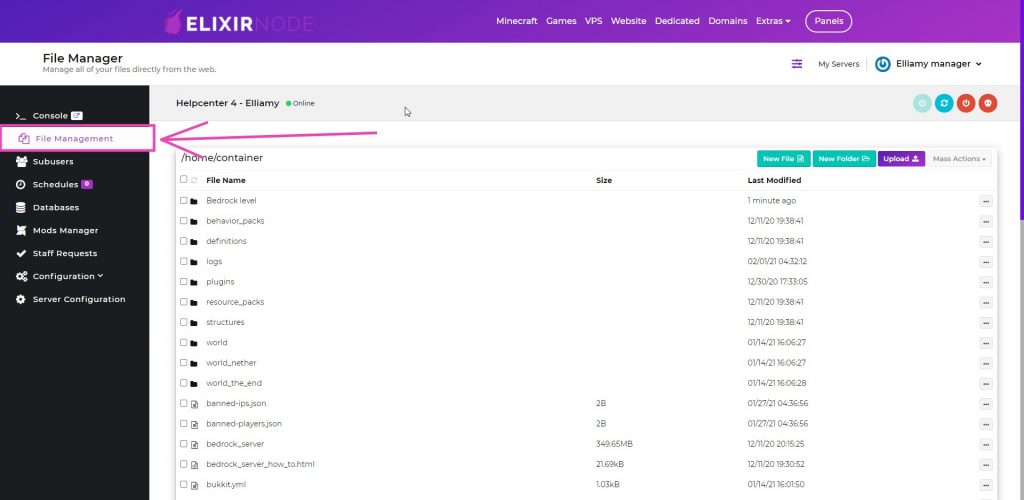
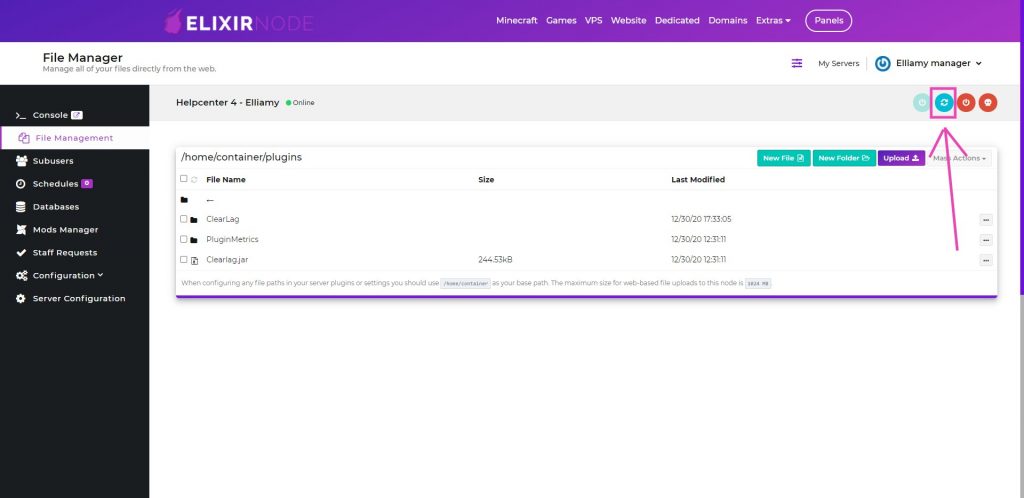
Login to the game panel, click “Manage” and then navigate to “File Management” on the left-hand side of your panel.
STEP 2
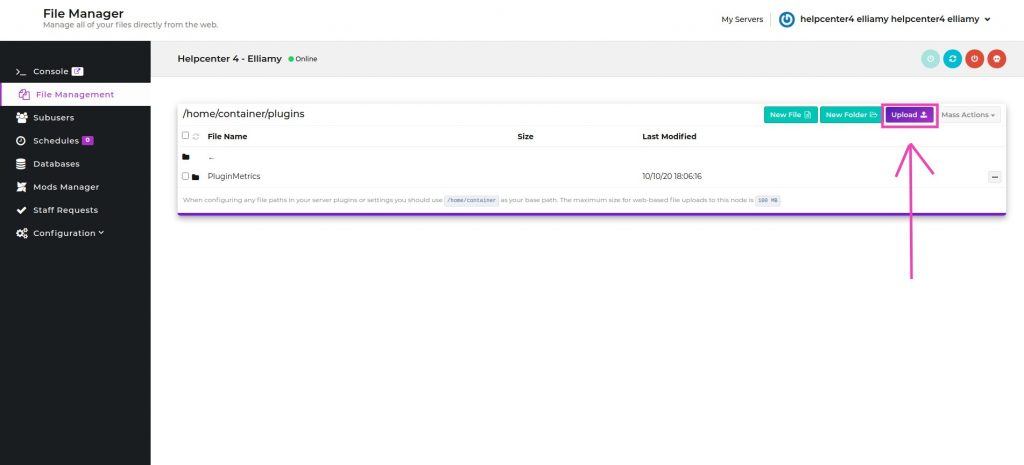
Navigate to the “Plugins” folder.

STEP 3
Click on the “Upload” button in the top-right of the page.
STEP 4
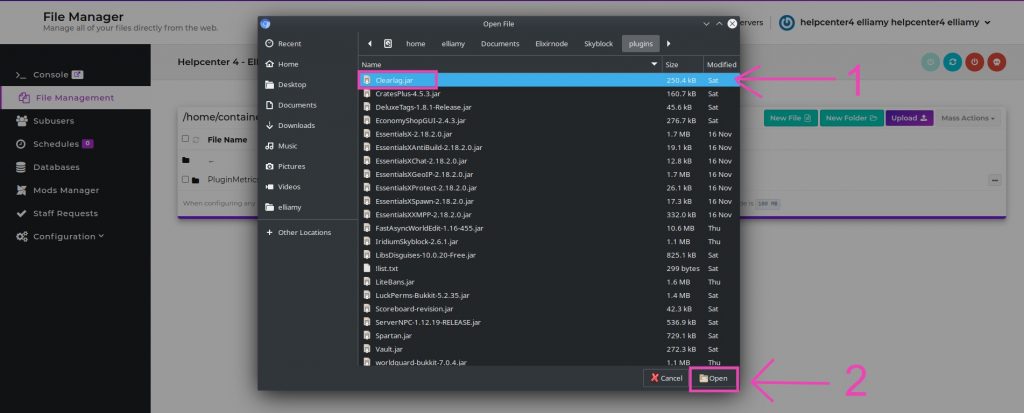
Select the plugin you wish to upload and submit it, in this example, we will be uploading the ClearLagg plugin.
STEP 5
Restart the server and enjoy your new plugin!
#2: Installing plugins using FileZilla
This optional step will explain how to install plugins using FTP software, such as FileZilla.
STEP 1
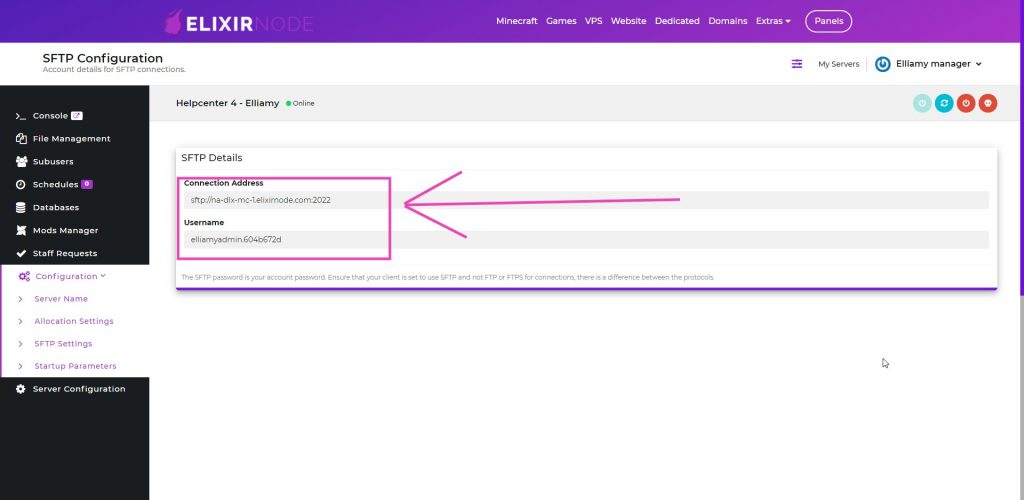
First locate the SFTP information on your game panel, which is located at “Configuration > SFTP settings” You should now be seeing a Connection Address and a Username, as seen below:
STEP 2
Now open up your FTP software, which for this tutorial will be Filezilla. You should see a set of boxes at the top of the page asking for a Host, Username, Password, and port. Enter the Connection address in the Host field and Username in the username field which was previously found on your SFTP settings page. In the Password field, you should enter the password you use to login into the game panel. Finally the port should be automatically good to go, if not put :2022 should not be in the host field and so just put 2022 manually to port. From there, go ahead and initiate the connection, as seen below.

STEP 3
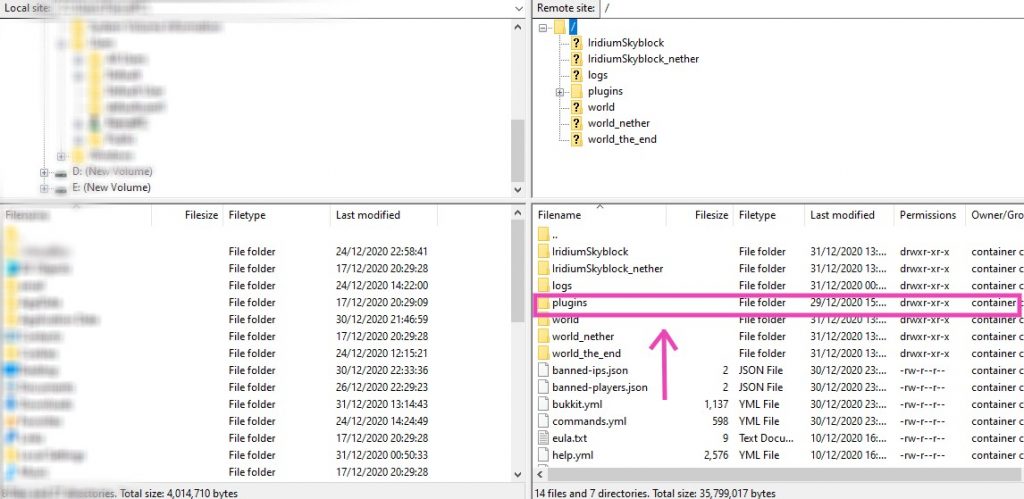
From here, you will see your computer files on the LEFT of the window, and the files on your minecraft server on the RIGHT of the window. Double click on the “Plugins” folder to access it.
STEP 4
From there, you should be seeing a list of all your currently installed plugins on the bottom right panel and your files on the bottom left panel (Blurred for my privacy). To install your plugins, all you now need to do is to locate the plugin on your computer using the bottom left panel, then drag and drop the file onto the bottom right panel. Congrats on installing your new plugin!
Closing tips!
– Plugins that are available for Minecraft server hosting and cost money are called premium plugins, finding the best Minecraft server hosting premium plugins can be hard. Luckily we’ve compiled a list of the best premium plugins out there, here, to ensure your money goes onto a fantastic product!
– Premium plugins are fantastic, but there are plenty of free alternatives! Shop around for a bit before you commit to a plugin as you might find a free version that will do the trick!
– Holographics displays is one of the most popular plugins out there, but it can be hard to learn and get the hang of. Luckily we have a guide on how to use it, here!
-Plugin not working? Check your console, it will often display the reason why the plugin isn’t working there!
If you still need help, contact us
FREE game server, VPS, web host, dedicated IP & more on most plans!
Get Started